Adding a file upload form to your Weebly site
With File Request Pro, you can easily embed a file upload form into your website to allow customers to upload files, CVs or job applications, or any other file you may need.
Adding your upload form to website it's a simple process. In this tutorial we show you how to add your upload form to your Weebly-powered site.
Adding a file upload form to your Weebly site
Start by getting your embed code as describe here.
Step 1: Decide where to display your upload form
Sign in into your Weebly dashboard, click Edit Site and navigate to the page that you wish to display the upload form on. One common practice is to create a new dedicated page just for your form or simply including them on the home or contact pages.
Step 2: Insert widget code.
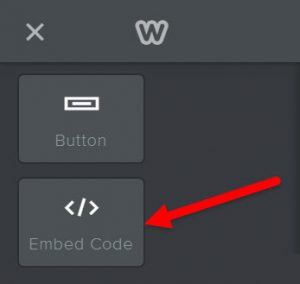
Find the “Embed Code“ box in the list of available elements on the left and drag-and-drop it into your page.

Next, click on the container to set custom HTML code followed by Edit Custom HTML.

Copy and paste the upload form widget code into the Custom HTML box and click anywhere outside the container to save it. Your upload form should instantly appear in that area.
Step 3: Publish the site.
Click Publish in the top-right corner to save the changes and you are done! Go ahead and preview the page to see what the upload form look like.
Note: there’s no need to change or update the widget code in Weebly if you customize the widget and change its layout or appearance within the widget’s dashboard. All the changes will automatically be reflected on your website without needing to update the code.