Google Forms is one of the easiest ways to collect responses online. But if you've ever shared a form and had recipients tell you they were blocked by a sign-in screen, you know the default settings can kill your response rate. Whether you're running a public survey, collecting event RSVPs, or gathering feedback from people outside your organization, you need your form to be accessible to everyone, not only people with Google accounts.
This guide covers how to make a Google Form public so anyone can respond without signing in, how to share it outside your organization, and the trade-offs that come with opening your form to the world.
Can You Fill Out a Google Form Without a Google Account?
Yes, but only if the form creator has configured it that way. By default, Google Forms created in Google Workspace (business or school accounts) may require respondents to sign in. Personal Gmail accounts create forms that are public by default.
What's possible depends on how the form is set up:
| Form Setting | Google Account Required? | Who Can Respond |
|---|---|---|
| "Limit to users in [organization]" ON | Yes (org account only) | Only people in your Workspace domain |
| "Collect email addresses" ON + "Limit to 1 response" ON | Yes | Anyone with a Google account (one response each) |
| "Collect email addresses" OFF + "Limit to 1 response" OFF | No | Anyone with the link |
| Form includes a file upload question | Yes (always) | Anyone with a Google account |
The bottom line: if you want anyone to fill out your form without a Google account, you need to turn off both the email collection and response limit settings. You also cannot include a file upload question, because that always forces sign-in regardless of your other settings.
How to Make a Google Form Not Require Sign In
You can make your Google Form accessible to anyone in under a minute.
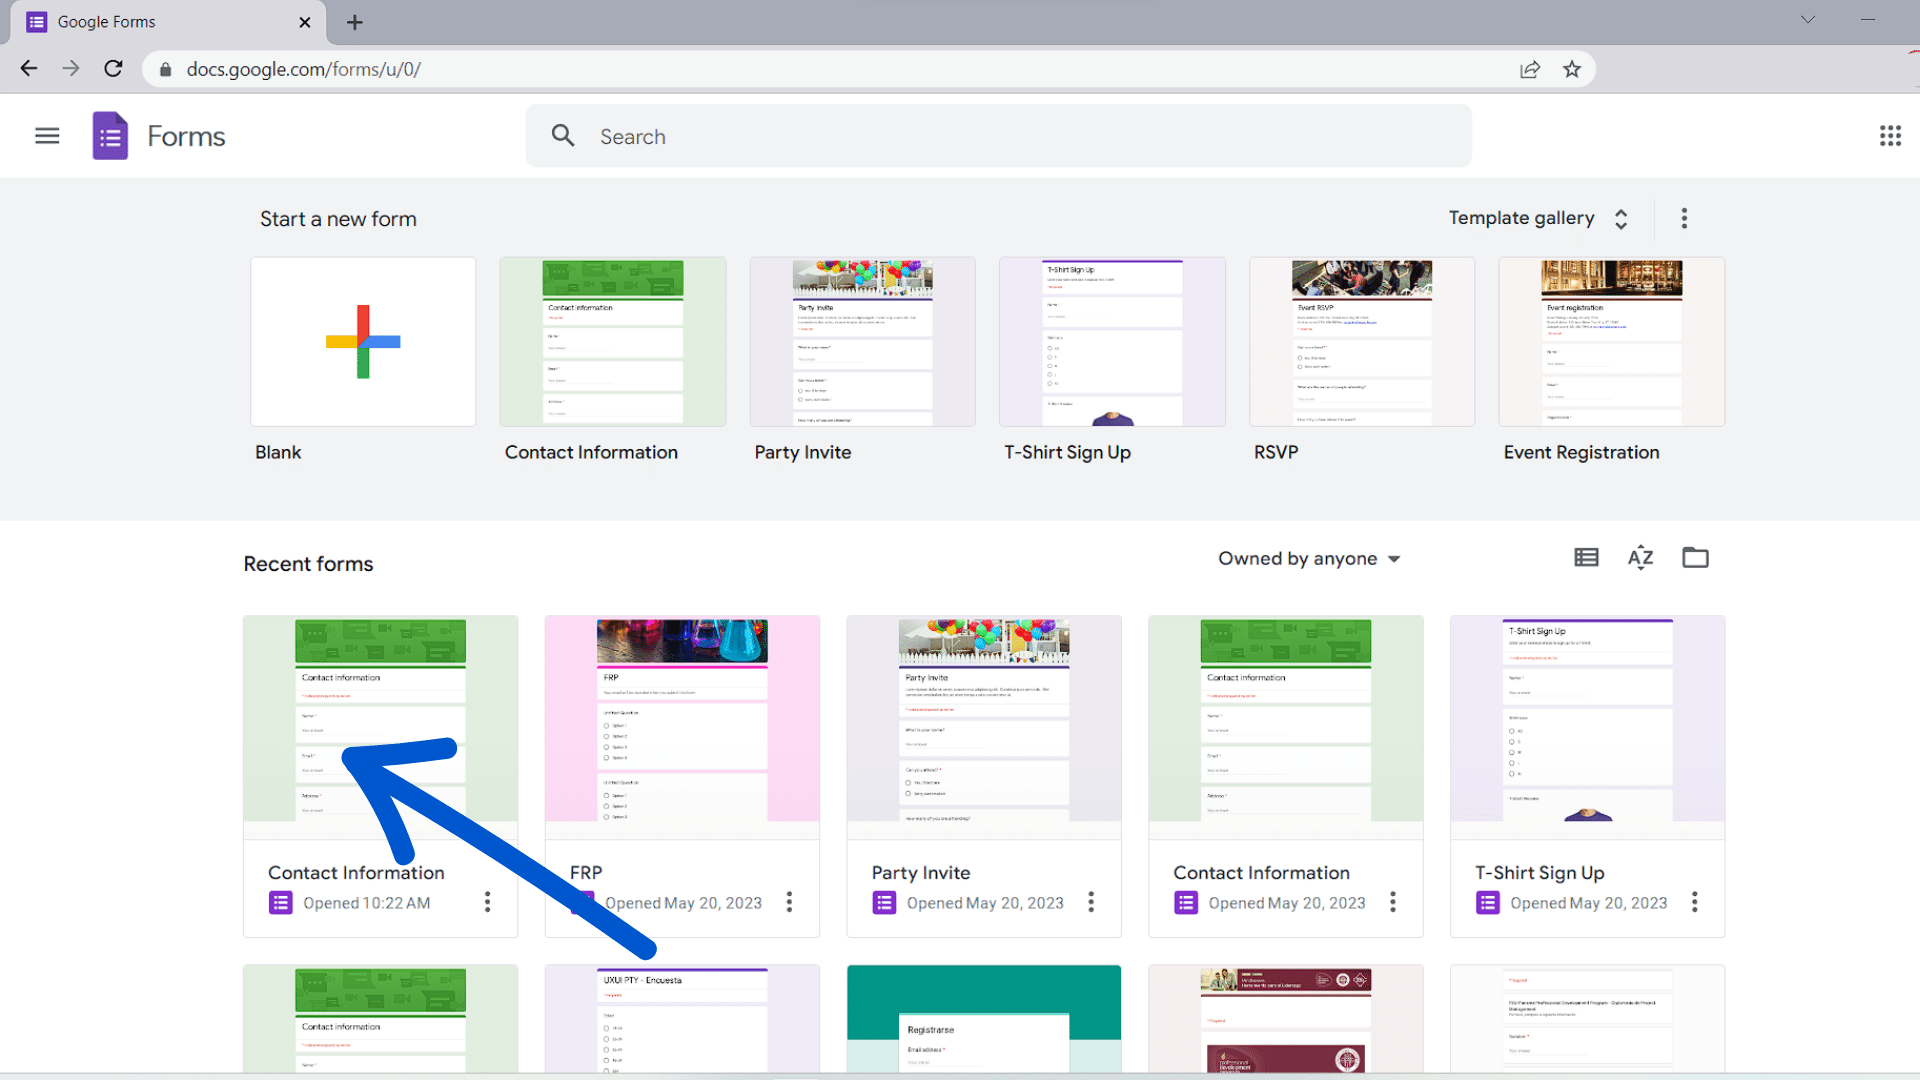
Step 1: Open your form in Google Forms
Go to forms.google.com and open the form you want to make public. If you haven't created one yet, start with a blank form or pick a template.
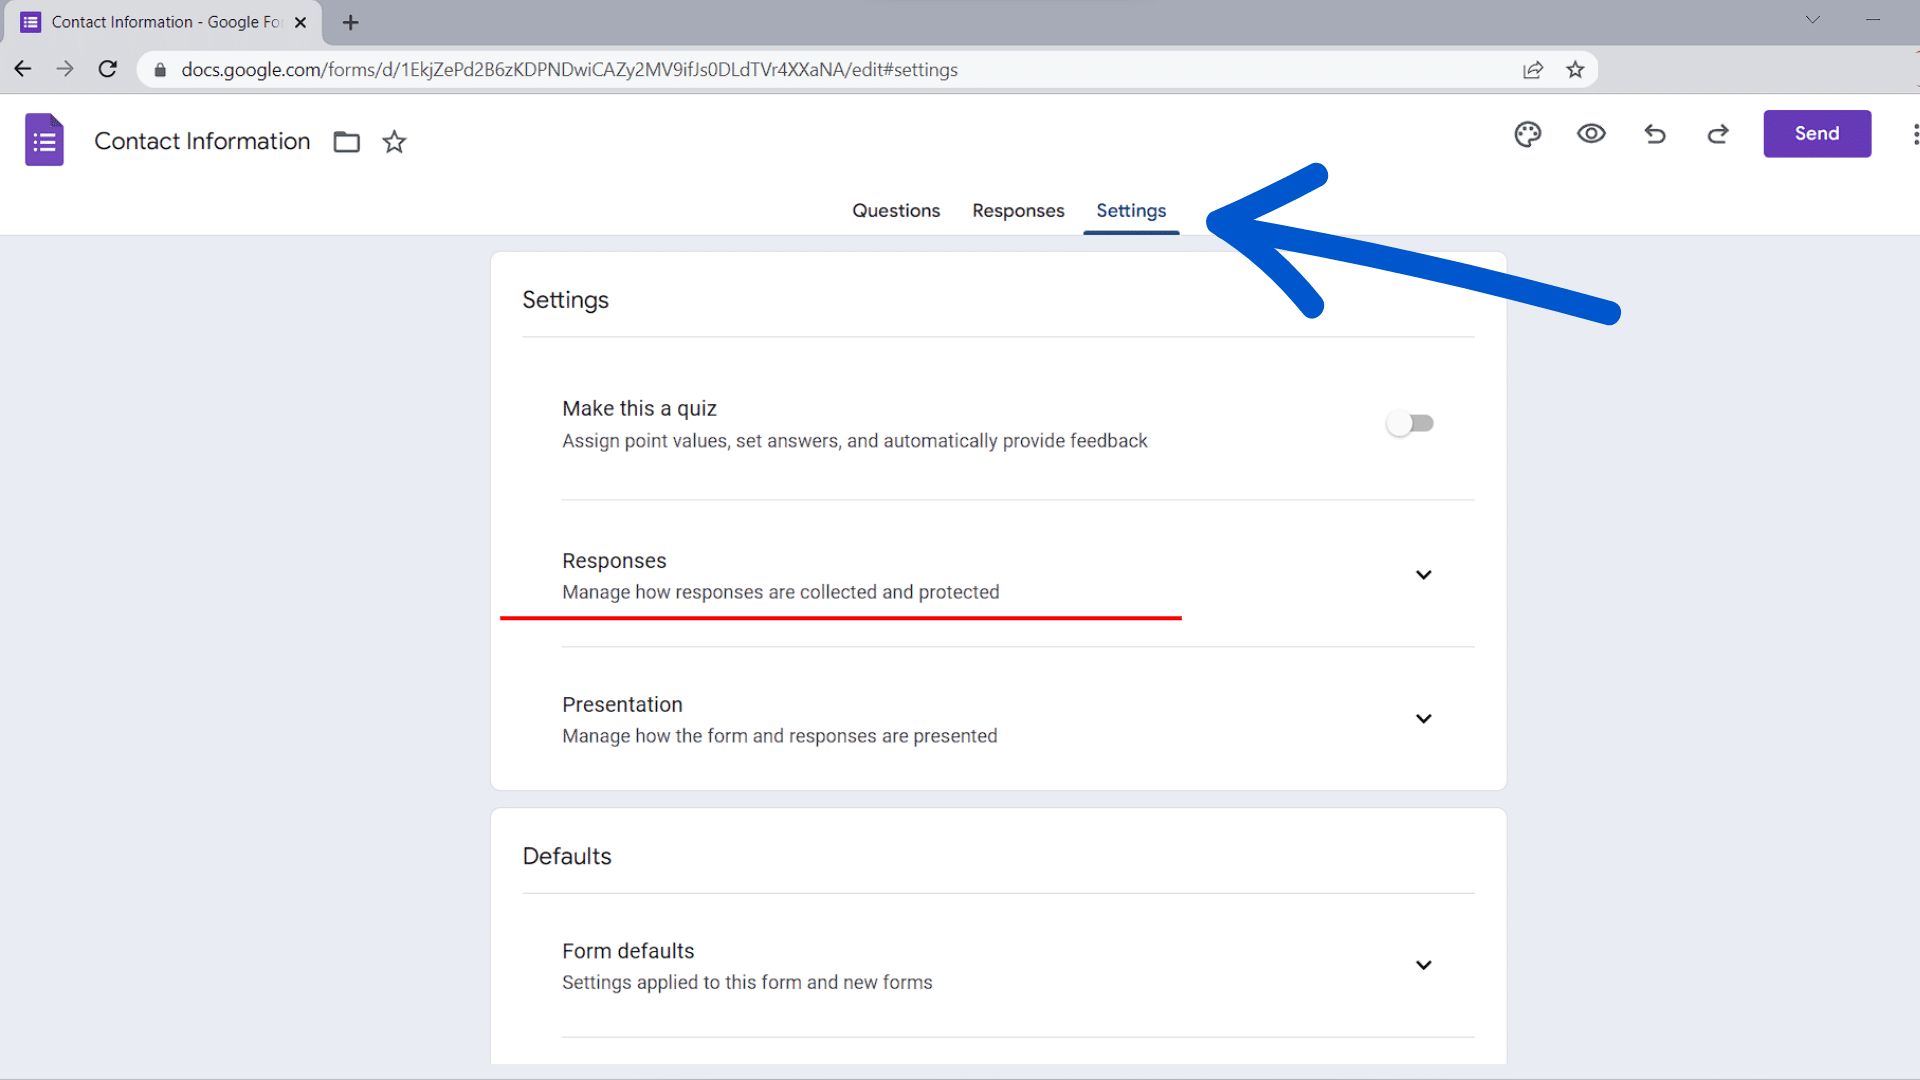
Step 2: Go to Settings and open the Responses section
Click the Settings tab at the top of the form editor, then expand the Responses section.
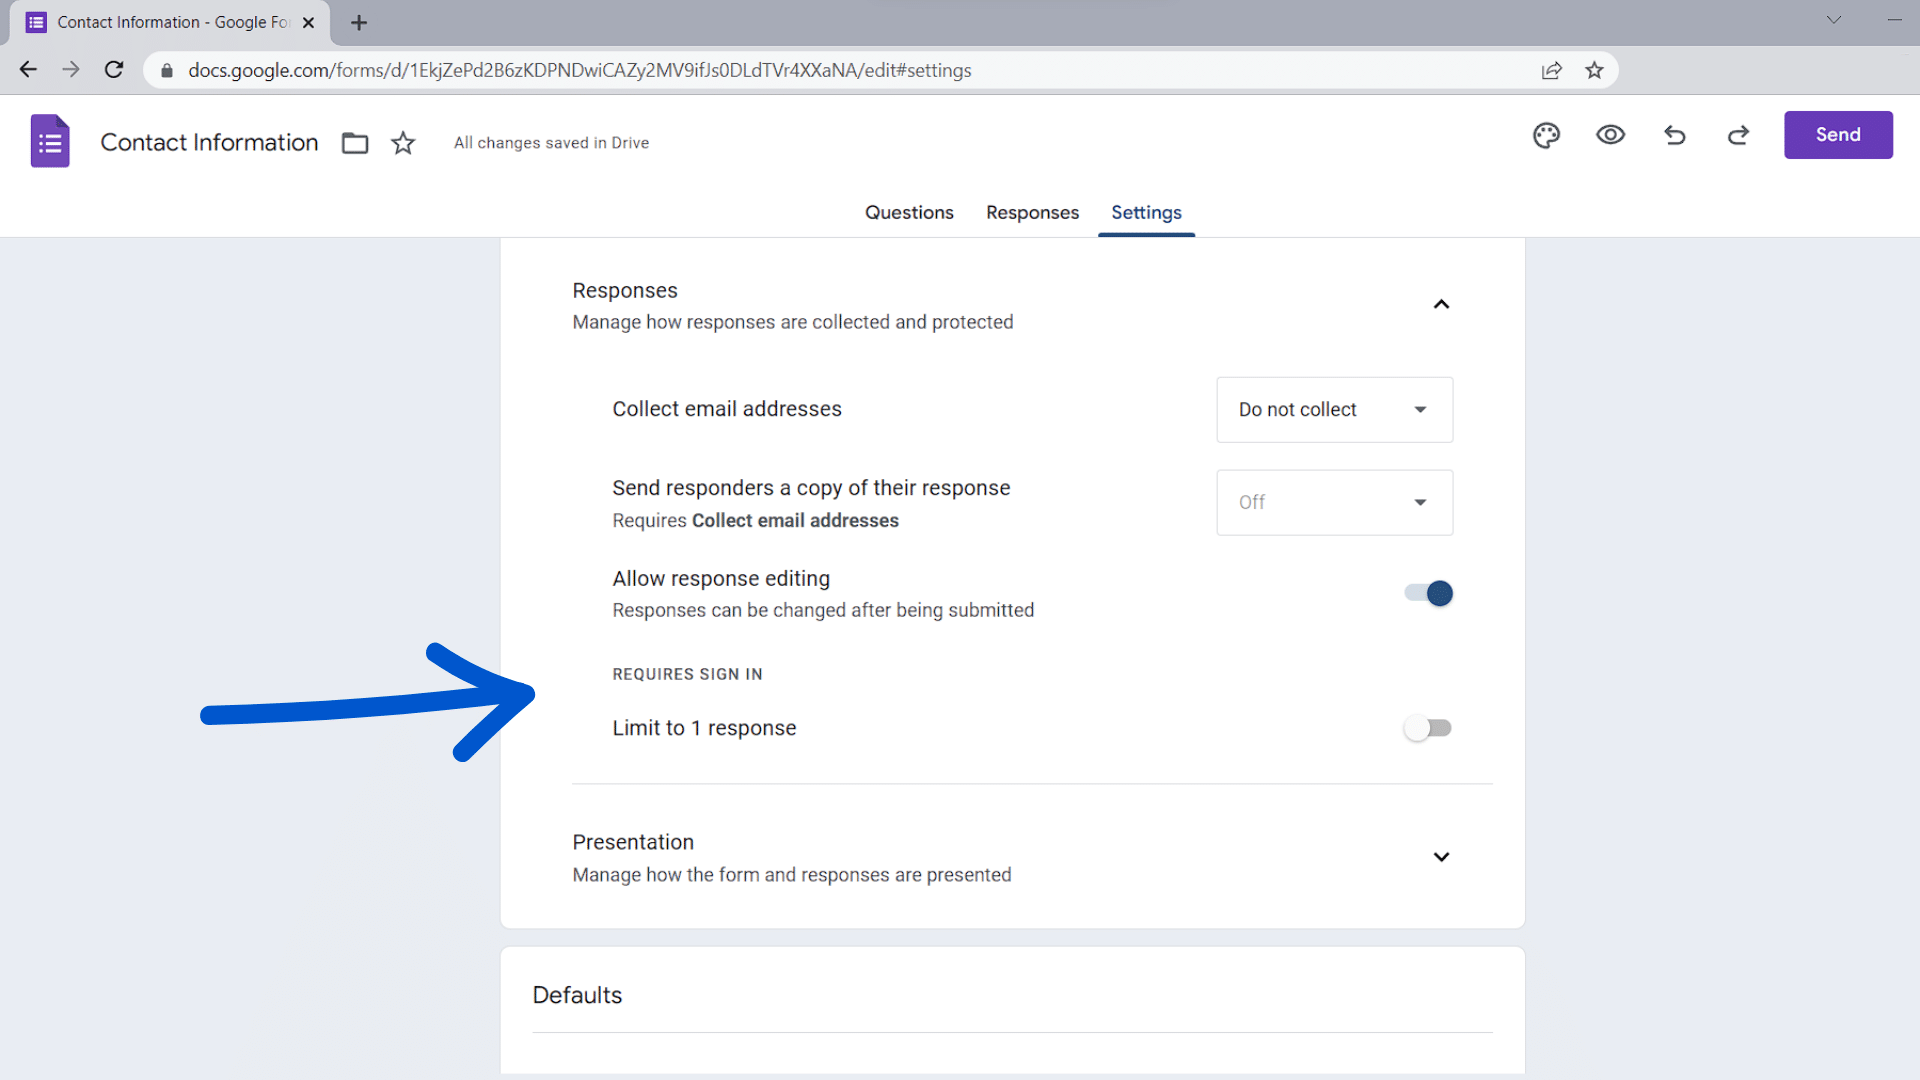
Step 3: Turn off sign-in requirements
Under "Requires Sign In," disable all toggle options:
- Limit to 1 response: Turn this OFF. When enabled, Google requires sign-in to track who has already responded, locking out anyone without a Google account.
- Collect email addresses: If enabled, turn it OFF too. This forces respondents to be signed in so Google can pull their verified email.
If you're using a Google Workspace account (business, school, or nonprofit), you'll also see an option labeled "Restrict to users in [your organization]." Make sure this is turned OFF. This is the setting that blocks people outside your domain.
Step 4: Remove any file upload questions
Scan through your form questions. If any question uses the File upload type, it will force every respondent to sign in, regardless of your other settings. There is no workaround within Google Forms. Either remove the file upload question or replace it with a text field asking respondents to paste a link to their file (via Dropbox, Google Drive, etc.).
For a deeper look at this limitation, see our guide on file uploads in Google Forms.
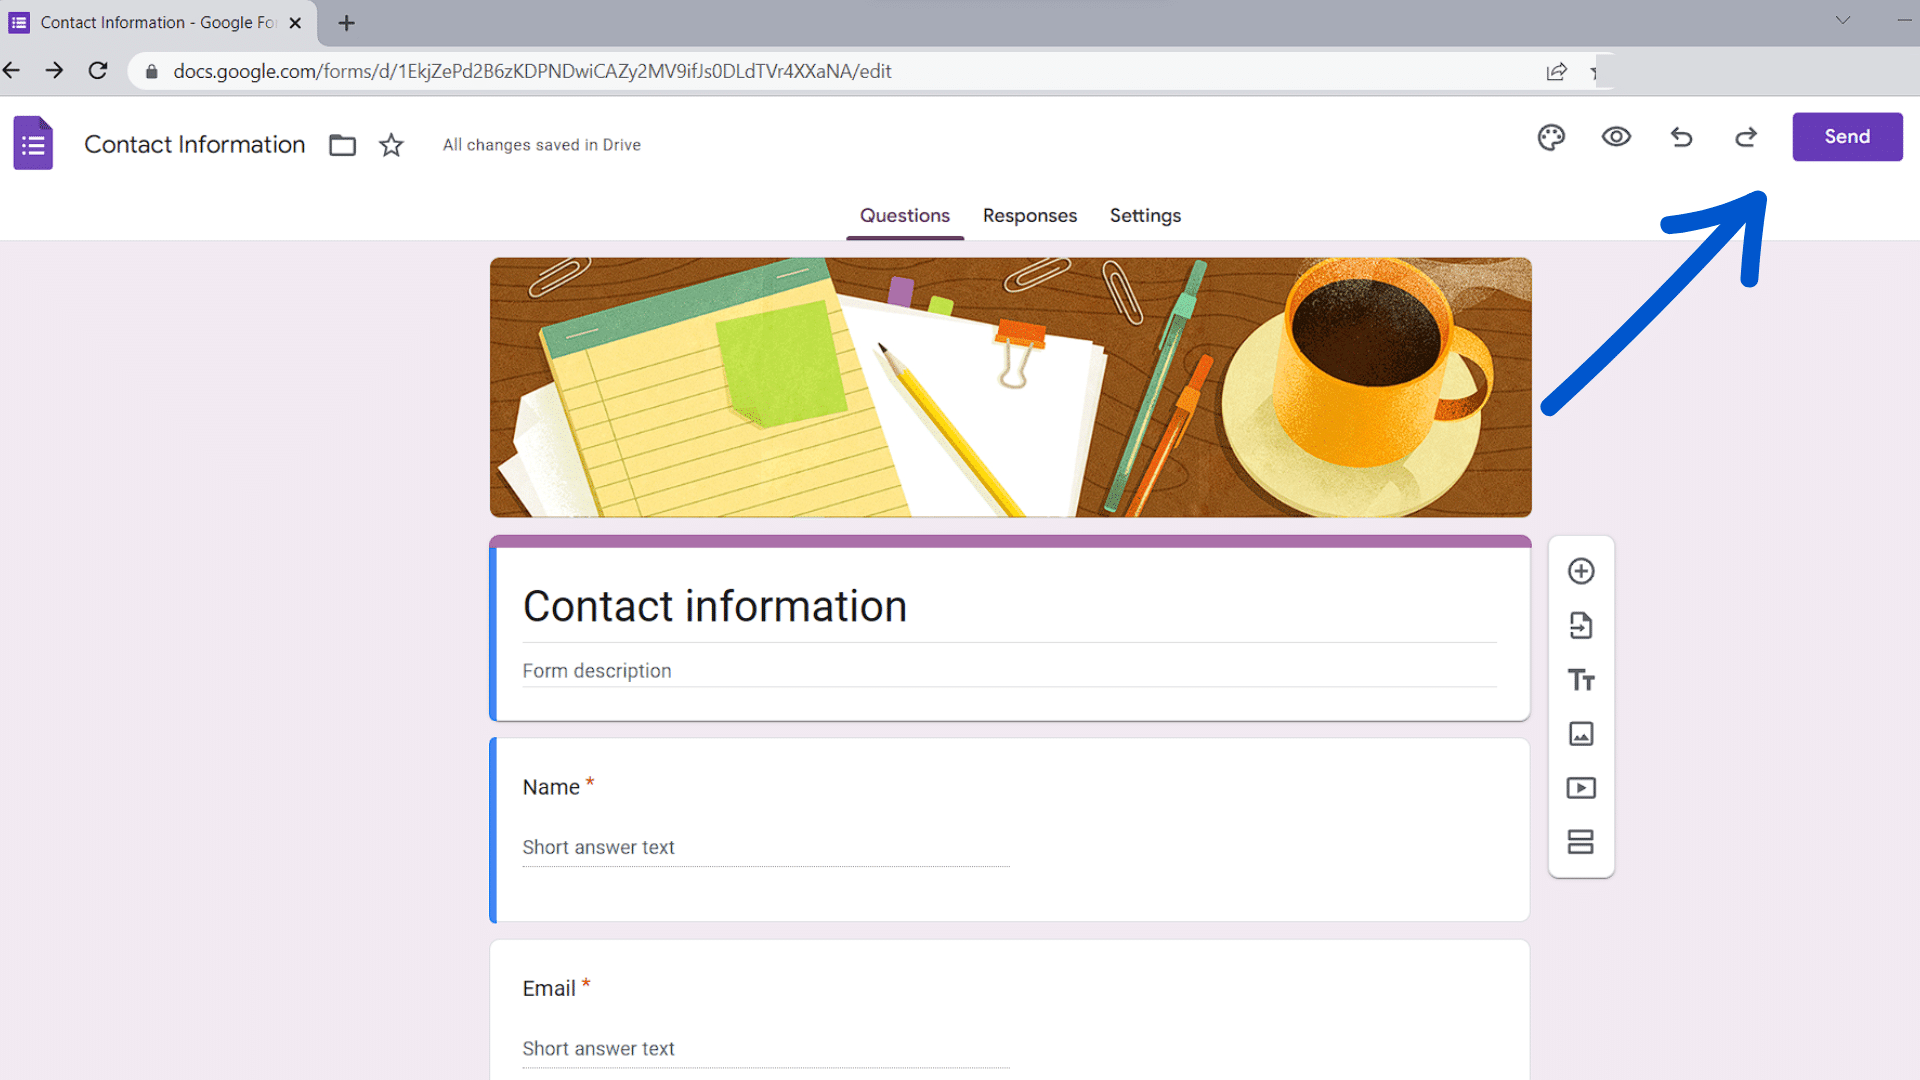
Step 5: Share the form
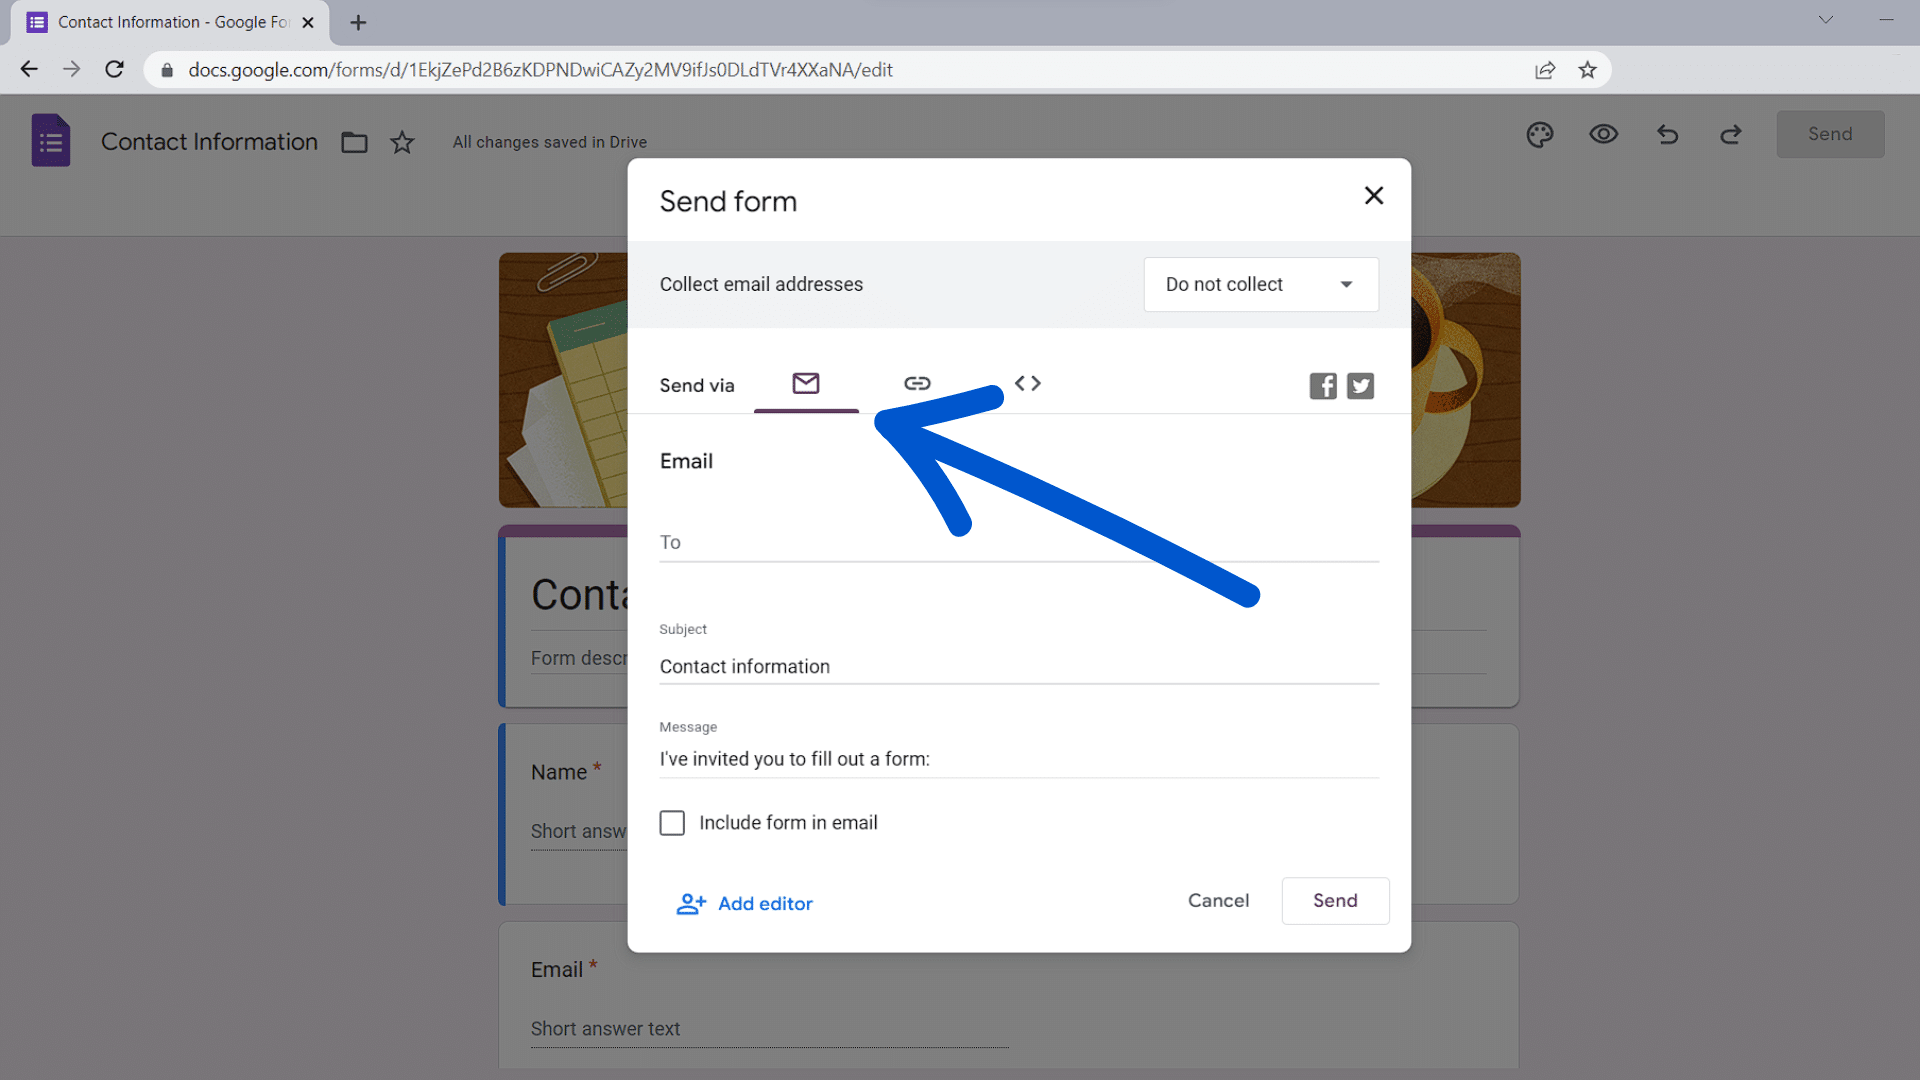
Click the Send button in the top right corner. Google Forms gives you several ways to distribute your form:
- Email: Send the form directly to recipients. You can add a subject line, message, and embed the form in the email body so recipients can respond without clicking away.
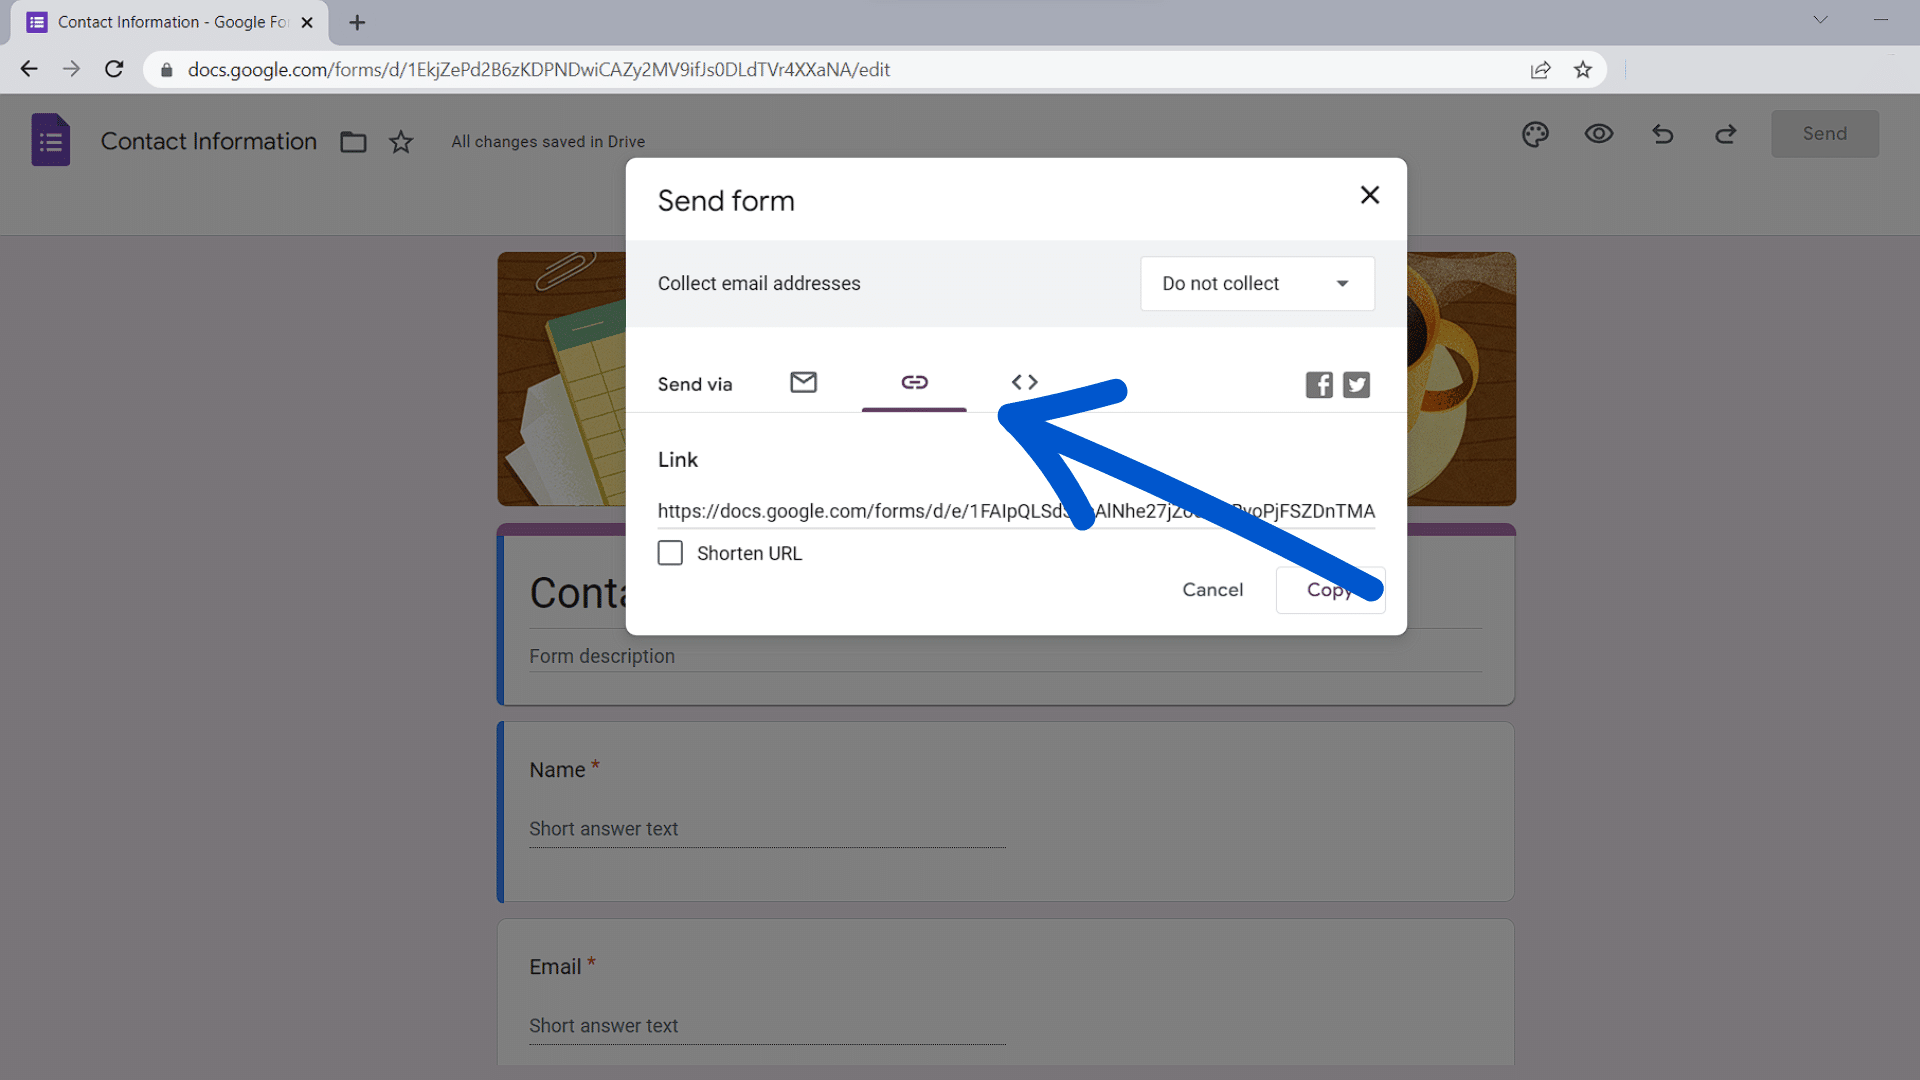
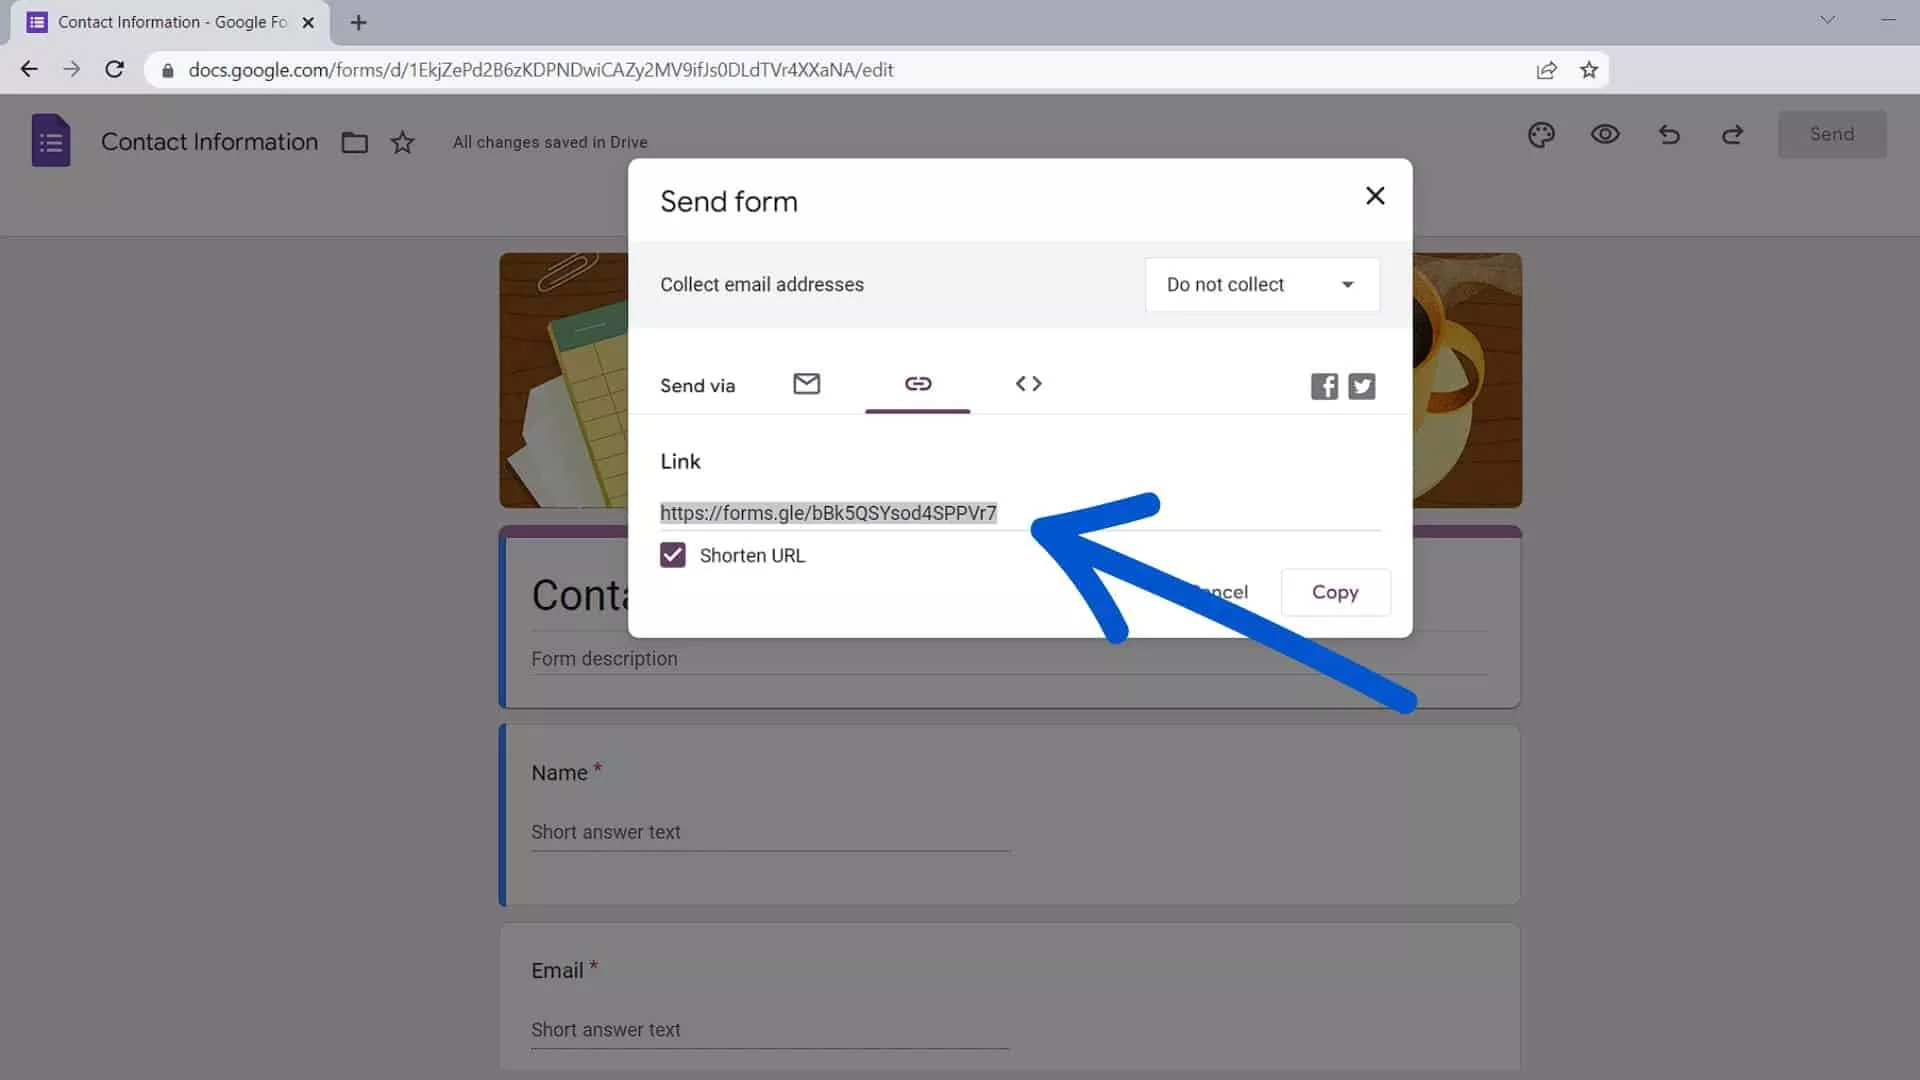
- Link: Generate a shareable URL. Check "Shorten URL" for a cleaner link. This is the most flexible option. Paste it into emails, Slack, WhatsApp, social media posts, or anywhere else.
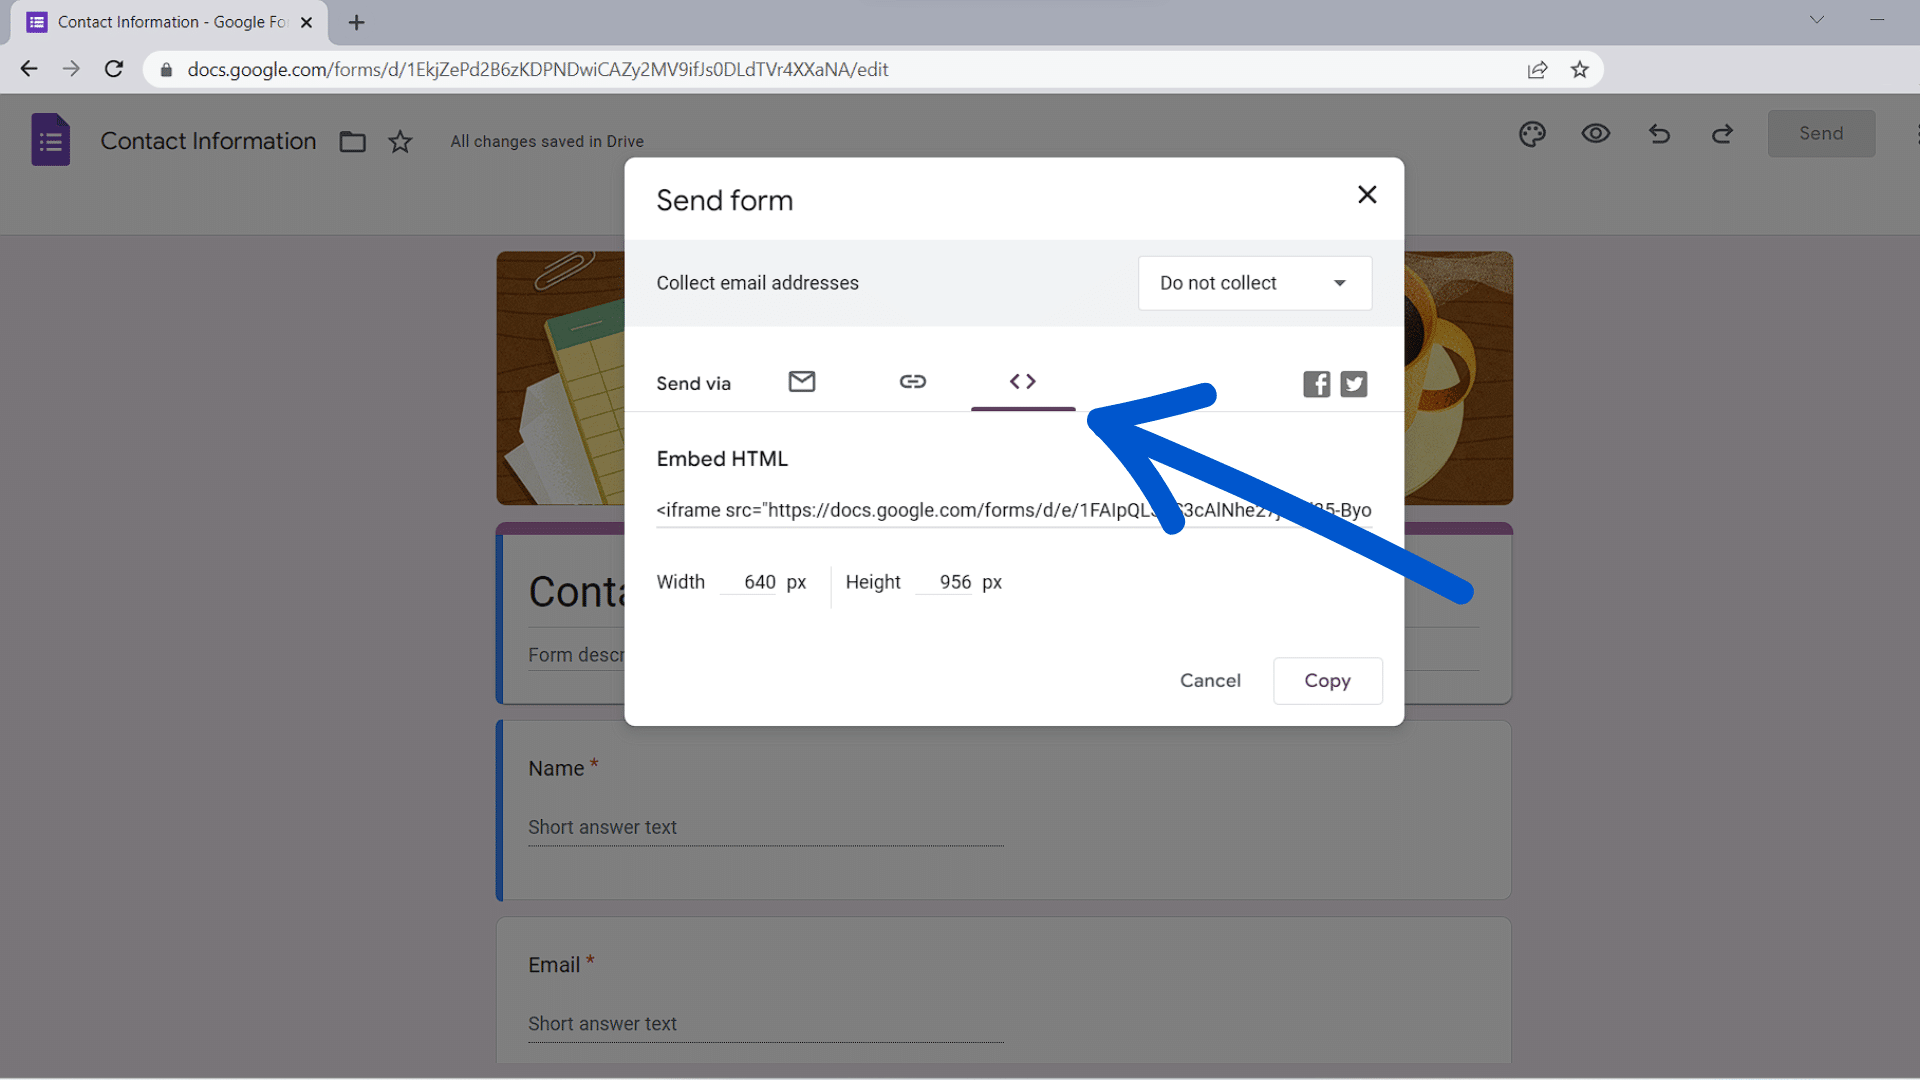
- Embed HTML: Copy an iframe code to embed the form on a webpage so respondents can fill it out without leaving your site. For a full walkthrough, see our guide on how to embed a Google Form.
- Social media: Share directly to Facebook or X (formerly Twitter) with a single click.
Step 6: Test the form in incognito mode
Before you send the form to anyone, verify it works without sign-in. Open a new incognito or private browsing window so you're not automatically signed in to Google.
- Click Send, switch to the link tab, and copy the URL.
- Open an incognito/private window in your browser.
- Paste the URL and press Enter.
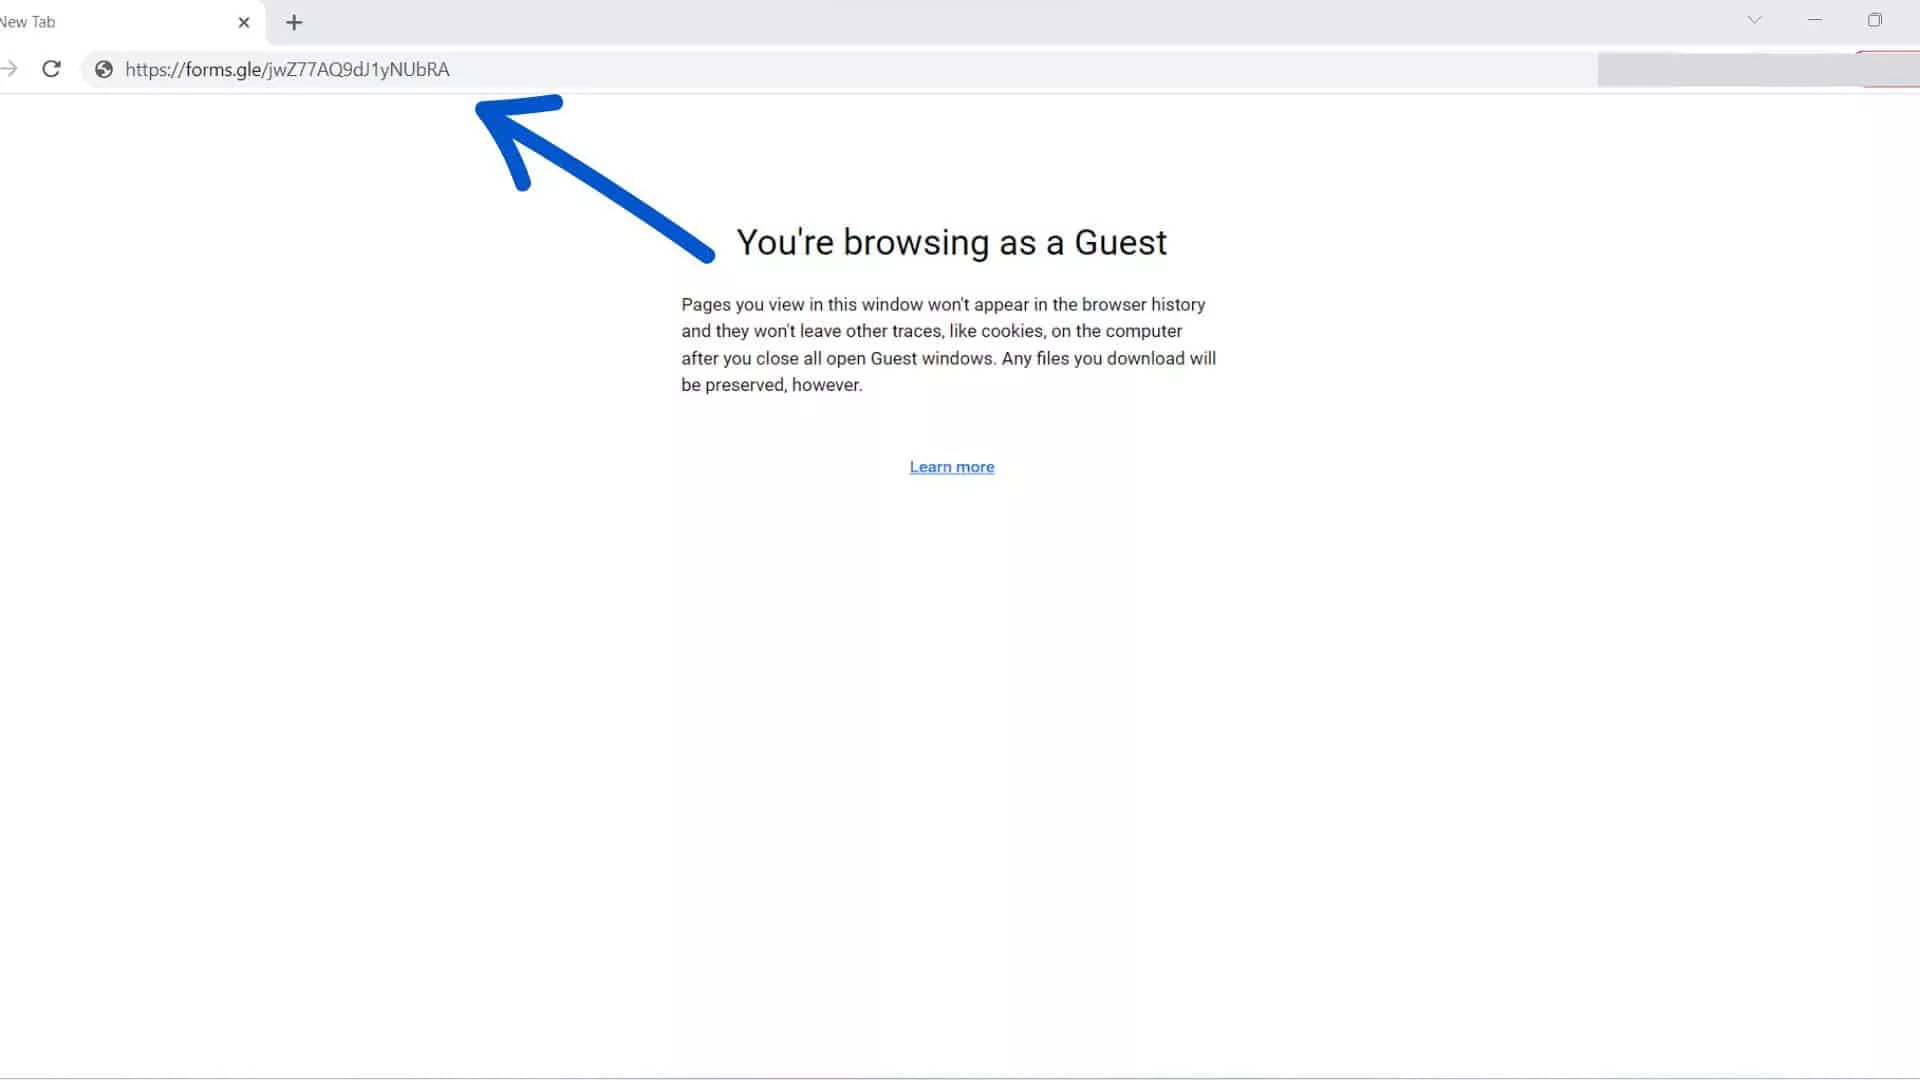
- If the form loads and you can submit a response without seeing a sign-in prompt, your form is public.
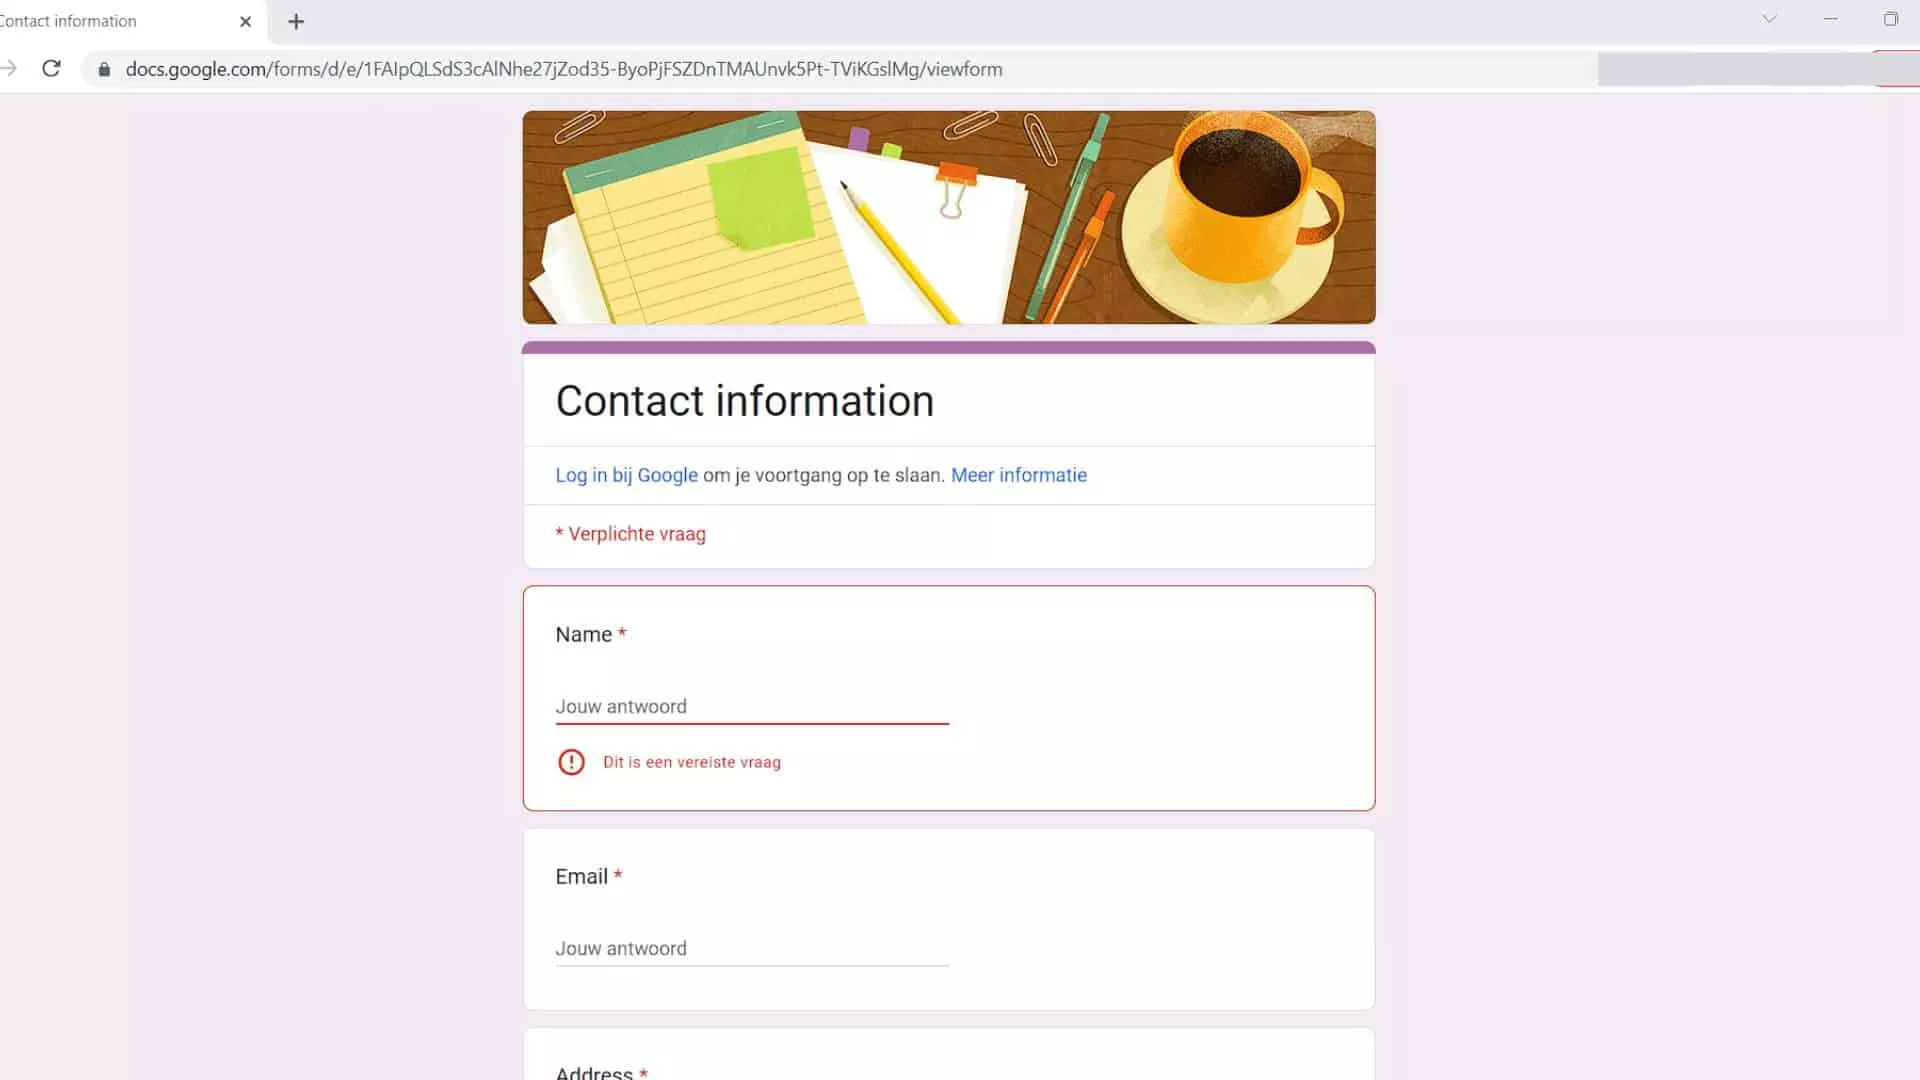
If you see a Google sign-in page instead, go back to your form settings and double-check that all sign-in requirements are turned off.
Can You Send a Google Form to Someone Without Gmail?
Yes. Once your form is set to not require sign-in, anyone can fill it out regardless of their email provider. They don't need a Gmail address or a Google account of any kind.
To send it to non-Gmail users:
- Share the link directly. Copy the form URL from the Send dialog and share it through any channel: email (Outlook, Yahoo, corporate email), Slack, WhatsApp, SMS, or any messaging app. The recipient clicks the link, fills out the form in their browser, and submits. No Google account needed.
- Embed the form on a website. Use the embed HTML option to place the form on a public webpage. Anyone who visits the page can fill it out, whether or not they have a Google account.
- Send via the email option in Google Forms. You can enter any email address in the "To" field. It doesn't have to be Gmail. The recipient gets an email with a link to the form.
The only scenario where a non-Gmail user gets blocked is when the form requires sign-in (through the settings covered above) or includes a file upload question. In those cases, the respondent needs at least a free Google account.
How to Share Google Forms Outside Your Organization
If you're using Google Forms through a Google Workspace account (provided by your company, school, or nonprofit), there's an extra layer of restrictions that catches many people off guard. Workspace administrators can limit forms to internal users only, and this setting is often enabled by default.
To open your form to people outside your organization:
Step 1: Check your form's response settings
Open your form, go to Settings > Responses, and look for the toggle labeled "Restrict to users in [your organization name]." If this is enabled, only people with an email address on your Workspace domain can access the form. Turn it OFF.
Step 2: Check with your Workspace admin
If you don't see this toggle, or it's greyed out, your Workspace administrator may have restricted external sharing at the domain level. You'll need to ask your IT admin to adjust the Google Forms sharing policy in the Google Admin Console under Apps > Google Workspace > Google Forms.
Step 3: Test with an external account
After making changes, test the form by opening it in an incognito window or from a personal (non-organization) email account. If the form loads without asking for organizational sign-in, external respondents can access it.
This is one of the most common reasons people think their Google Form "isn't working." The form itself is fine. The organization's sharing settings are blocking external access.
Google Forms Public vs. Private: What's the Difference?
Google Forms doesn't have a single "public" or "private" toggle. Instead, several settings control who can access your form and what information they need to provide.
| Feature | Public Form | Private Form |
|---|---|---|
| Who can respond | Anyone with the link | Only signed-in users (or org members) |
| Google account required | No | Yes |
| Email addresses collected automatically | No (manual field needed) | Yes (verified by Google) |
| Limit to 1 response per person | Not enforceable | Yes (tied to Google account) |
| File upload questions | Not available | Available |
| Response editing after submission | Only via link in confirmation | Linked to respondent's account |
| Spam and duplicate submissions | Higher risk | Lower risk (account-based) |
| Best for | Open surveys, public feedback, anonymous responses | Internal surveys, file collection, verified responses |
When to use a public form: You want the widest possible reach and don't need to verify who's responding. Customer satisfaction surveys, event registrations, community feedback, or any form where requiring sign-in would drive people away before they finish.
When to use a private form: You need verified identities, want to prevent duplicate submissions, or need file uploads. Internal company surveys, student assignments, and document collection where accountability matters.
Limitations of Public Google Forms
Making a form public removes barriers for respondents, but it also strips away protections that keep your data clean and your workflow manageable.
No file uploads
This is the biggest limitation. The file upload question type requires respondents to sign in to a Google account, always. You cannot add a file upload field and keep the form public at the same time. If you need to collect documents, images, or any other files without requiring sign-in, Google Forms can't do it.
Some people work around this by adding a text field asking respondents to paste a link to their file (hosted on Google Drive, Dropbox, etc.). That works in a pinch, but it puts the burden on the respondent and gives you no control over file formats, naming, or organization.
If collecting files from people who don't have Google accounts is a core requirement, you need a different tool. File Request Pro lets anyone upload files through a branded upload page (no account required) and routes the files directly to your Google Drive, OneDrive, or SharePoint, organized into folders automatically.
Spam and junk submissions
Public forms are open to anyone, which means they're also open to bots and bad actors. Without sign-in as a gatekeeper, you may see spam responses pile up, especially if the form URL is posted on a public webpage. Google Forms doesn't include a built-in CAPTCHA, and its automated spam filtering catches only the most obvious junk.
To reduce spam on public forms:
- Add a required question that asks for specific information a bot wouldn't know (e.g., "What event are you registering for?")
- Use response validation on fields like email format
- Monitor responses regularly and delete junk entries
- Avoid posting the form URL on public websites where scrapers might find it
No duplicate prevention
When sign-in is disabled, Google has no way to enforce "Limit to 1 response." Anyone can submit the form multiple times, accidentally or deliberately. If you're running a vote, contest, or any form where duplicate responses would skew your results, a public form is the wrong choice.
No verified email addresses
Without sign-in, you can still ask respondents to type their email address into a text field, but nothing verifies it. People can mistype their email, enter a fake address, or skip it entirely (unless you make it required). When you try to follow up, you'll hit bounced emails, dead ends, and gaps in your contact list.
Limited branding and customization
Google Forms offers basic theming: a header image, accent color, and font choice. But you can't add your company logo to the form body, remove Google's branding, host the form on your own domain, or apply custom CSS. For internal forms, this rarely matters. For customer-facing forms, the generic Google Forms look can undermine trust and make your business feel less professional.
No automated reminders
If you share a public form and some people don't respond, Google Forms gives you no way to send follow-up reminders. You'd need to track who responded manually (difficult without verified email collection) and send reminders through a separate tool. When you're collecting data from clients or gathering documents for a project, this manual chase eats hours every week.
Make Google Form Editable by Anyone (Adding Collaborators)
There's an important distinction between people who respond to your form and people who edit it. Respondents fill out the form. Collaborators can change questions, view all responses, and modify the form's settings.
To add collaborators who can edit your form:
- Click the three-dot menu (More options) next to the Send button in the top right corner.
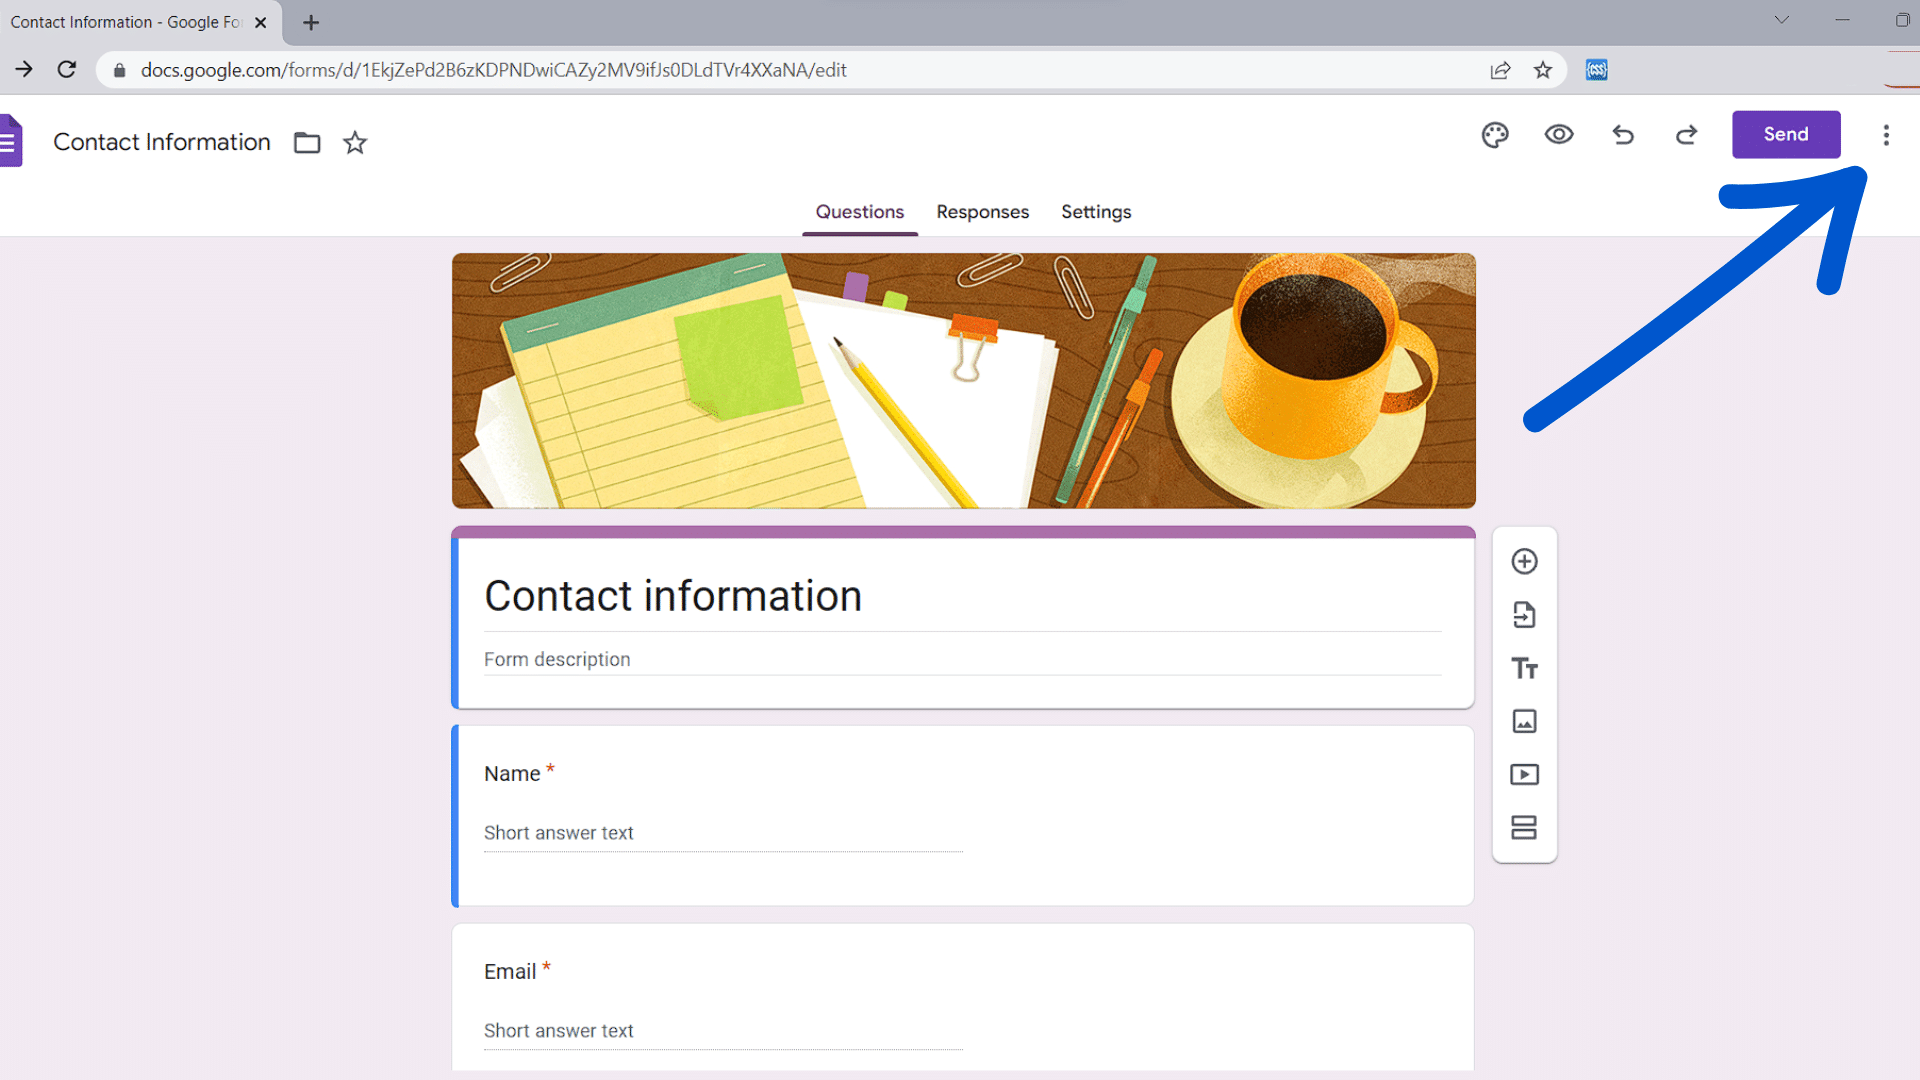
- Select "Add collaborators."
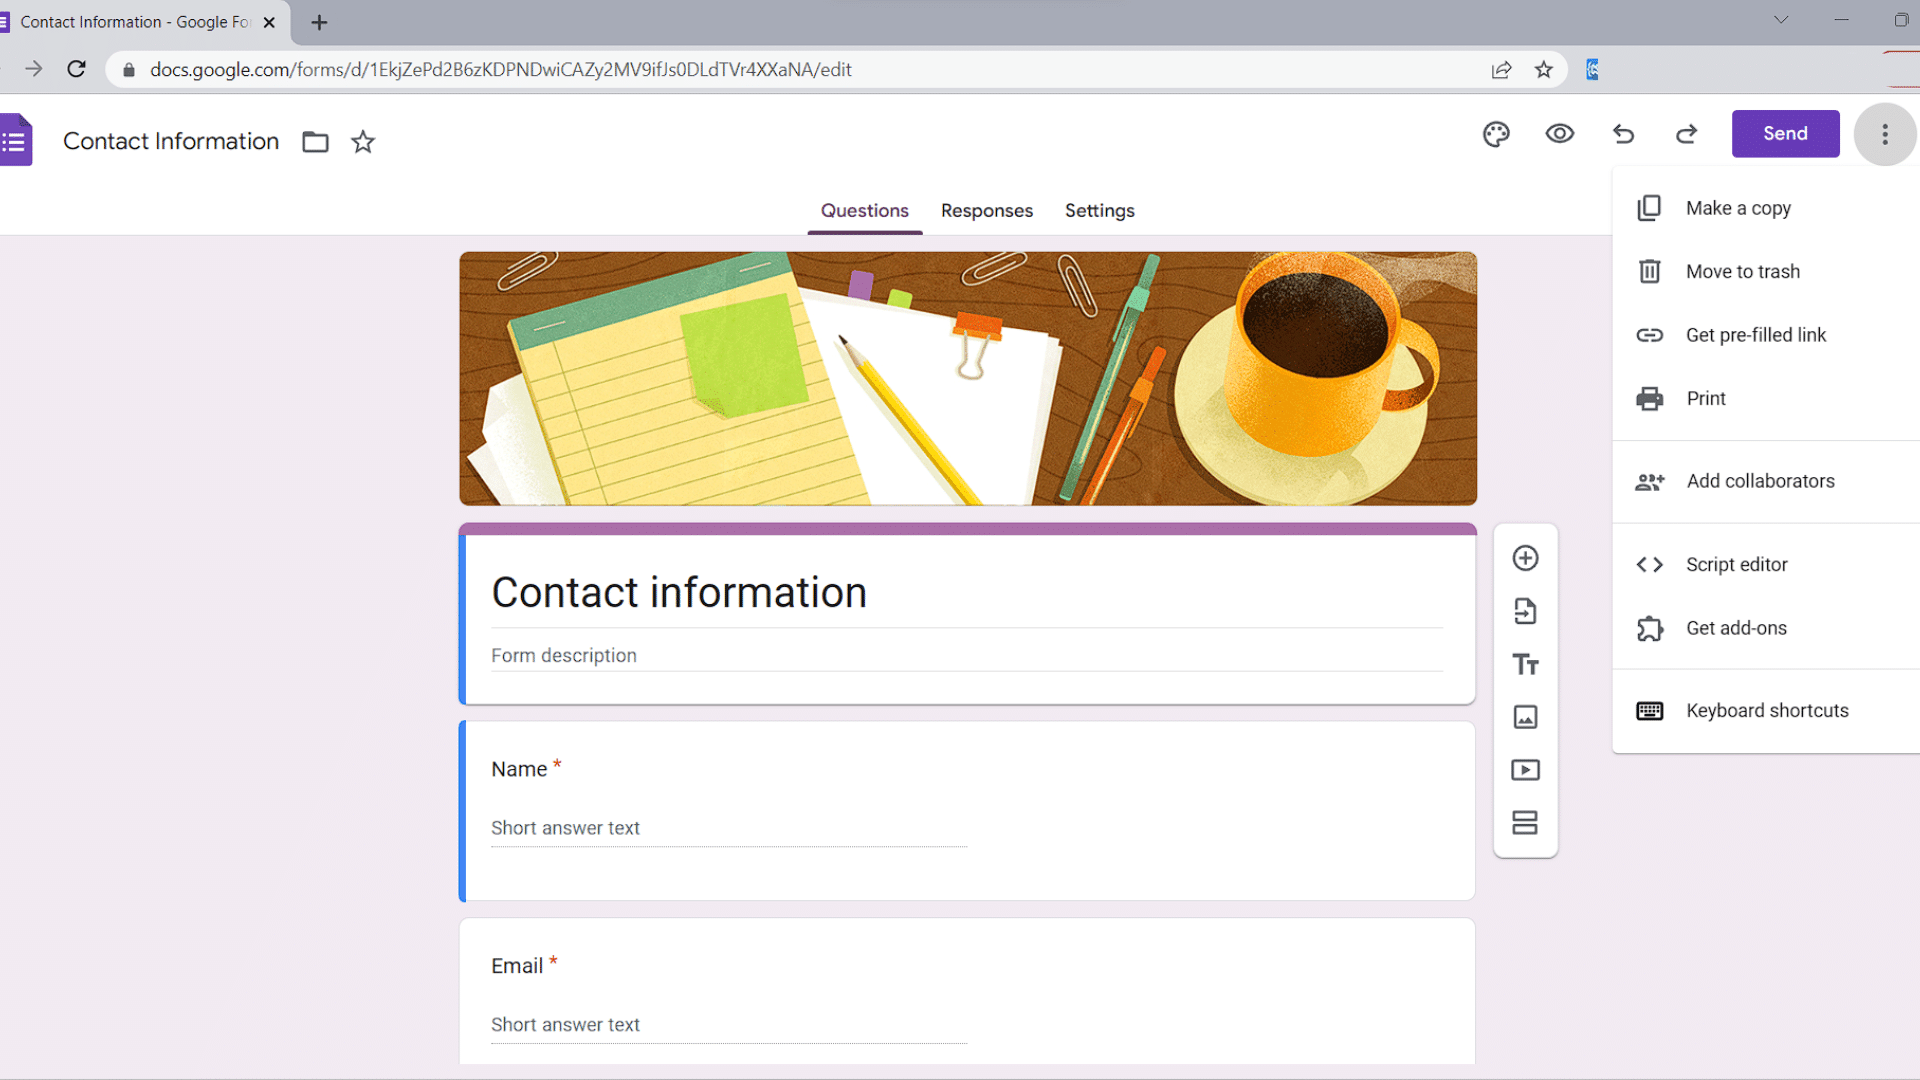
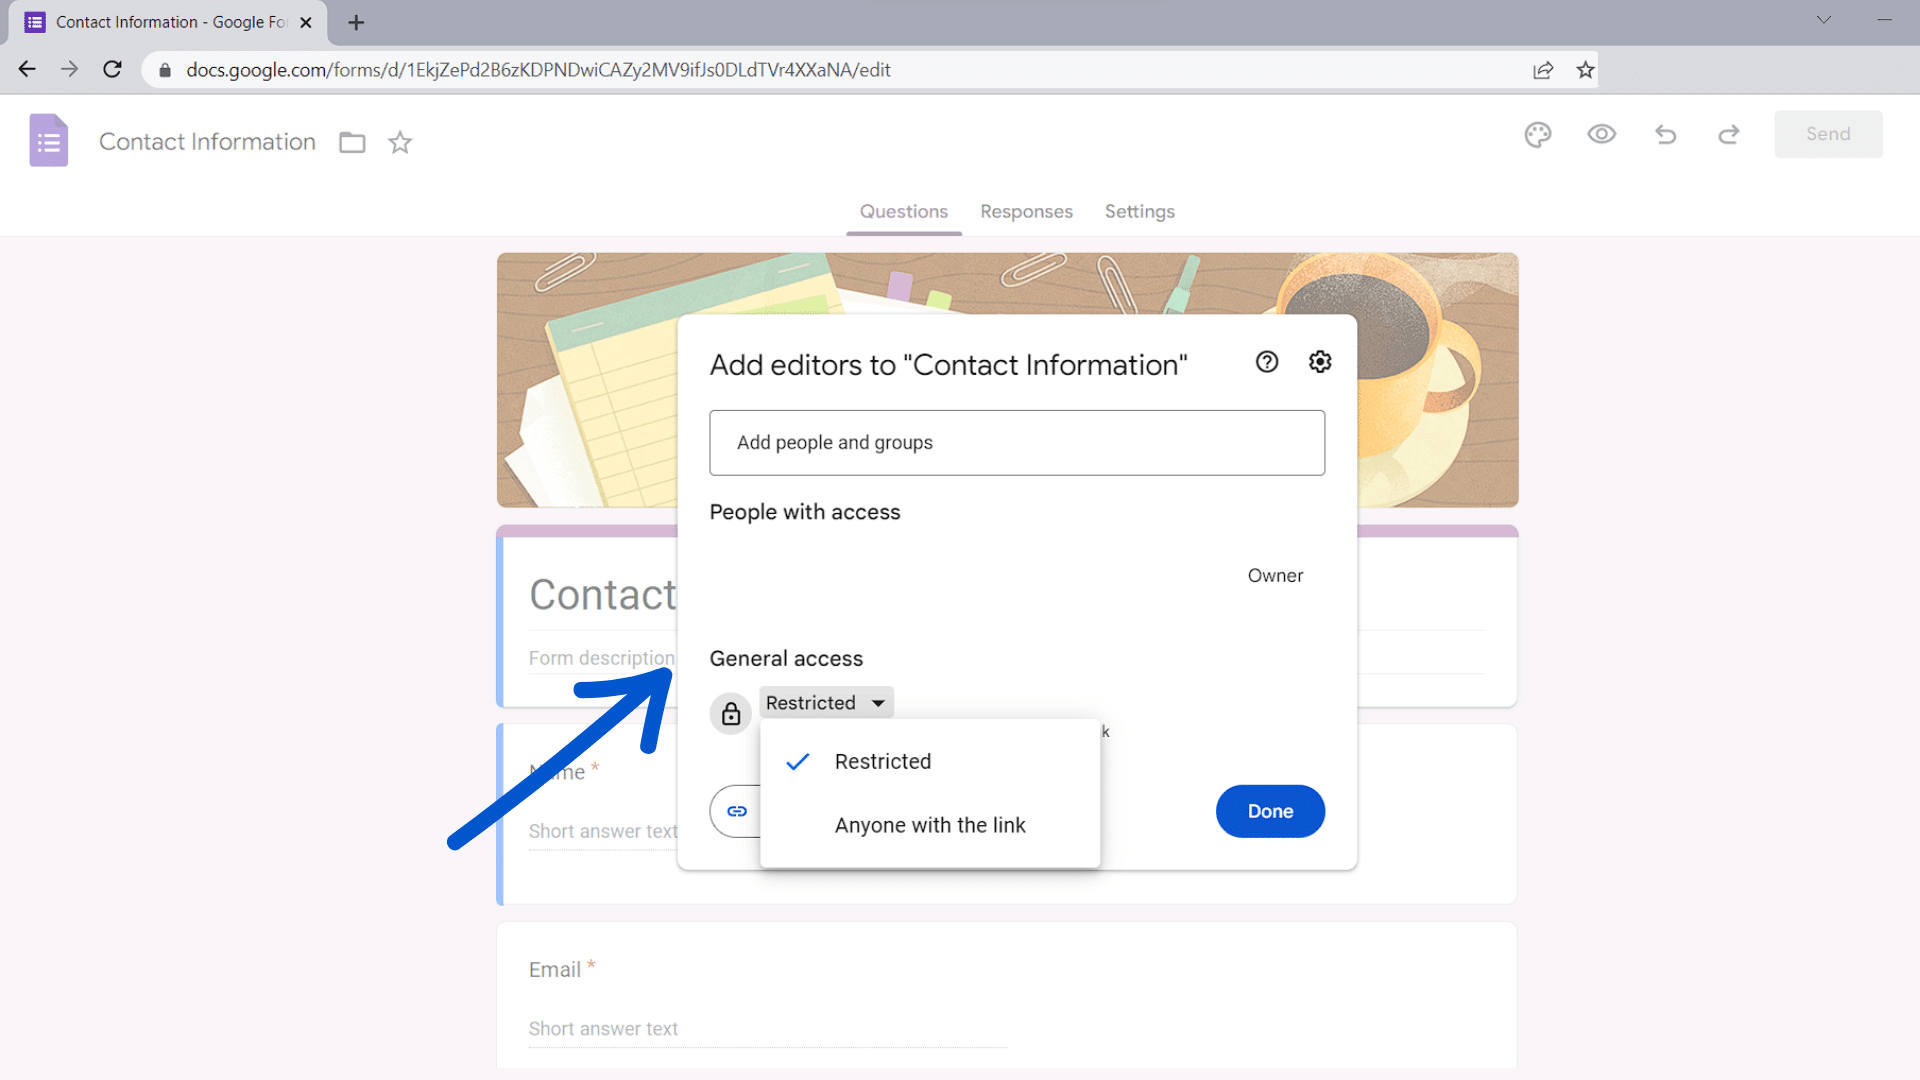
- In the sharing dialog, choose how you want to grant access:
- Restricted: Only people you specifically add can edit the form. Enter their email addresses in the "Add Editors" field. This is the safest option for most cases.
- [Your organization name]: Anyone in your Google Workspace domain with the link can edit. Useful for team-wide forms.
- Anyone with the link: Anyone on the internet with the link can edit the form. Avoid this unless you have a clear reason. One forwarded link could let strangers rewrite your questions or delete responses.
Keep collaborator access set to Restricted unless you have a specific reason to open it up. Making a form public for responses is different from making it editable by anyone.
When Google Forms Isn't Enough
Google Forms handles public surveys and simple feedback collection well. But as your needs grow, you'll hit its limits, especially around file collection, branding, and workflow automation.
Where Google Forms falls short for professional use:
- File collection from external contacts. If you need clients, vendors, or partners to upload files, Google Forms either requires them to sign in or blocks uploads entirely on public forms. Either way, you lose responses.
- Branded experience. You can't white-label a Google Form or host it on your own domain, so client-facing forms look generic instead of reflecting your brand.
- Automated follow-ups. No built-in way to remind specific people to complete your form, so you're left chasing people by email manually.
- Organized file storage. Uploaded files land in a single Drive folder with auto-generated names. Collecting documents from dozens or hundreds of people turns into a sorting nightmare.
File Request Pro is built for collecting files and information from people outside your organization. Upload pages carry your logo, colors, and custom domain. Respondents don't need any account to upload. Files route straight to your Google Drive, OneDrive, or SharePoint, automatically organized into folders by person. Automated reminders nudge people who haven't submitted yet, so you don't have to chase them.
If your main goal is a quick public survey, Google Forms is the right tool. If you need to collect files, documents, or structured information from clients without the sign-in barrier, try File Request Pro free.
Frequently Asked Questions
How do I make a Google Form public without requiring sign-in?
Open your form, go to Settings > Responses, and turn off "Limit to 1 response" and "Collect email addresses." If you're on a Google Workspace account, also disable "Restrict to users in [your organization]." Make sure the form doesn't include any file upload questions, as those always require sign-in.
Why does my Google Form still ask for sign-in after I changed the settings?
Three common causes: (1) your form contains a file upload question, which always requires sign-in; (2) the "Restrict to users in [organization]" setting is still enabled; or (3) your Google Workspace admin has restricted external form access at the domain level. Check all three, and test in an incognito window to rule out cached sign-in states.
Can someone without a Google account fill out a Google Form?
Yes, if the form is configured to not require sign-in. Turn off email collection and response limits in the form settings. The person can then open the form link in any browser and submit a response without any Google account. The one exception is forms with file upload questions, which always require a Google account.
Can I make a Google Form public but still collect email addresses?
Not through Google's built-in email collection, which requires sign-in. But you can add a standard text question asking for the respondent's email address. The downside: nothing stops people from entering a typo or a fake address. If verified emails are essential, you'll need to keep sign-in enabled or use a different form tool.
How do I share a Google Form with people outside my company?
Go to Settings > Responses and turn off "Restrict to users in [your organization]." This setting is specific to Google Workspace accounts and is the most common reason external people can't access your form. If the toggle is greyed out, your Workspace admin needs to change the domain-level sharing policy.
Can I add file uploads to a public Google Form?
No. Google Forms requires respondents to sign in to a Google account before uploading files, and there's no way to turn this off. If you need to collect files from people without requiring an account, use a tool like File Request Pro, which supports file uploads with no account or sign-in needed. Learn more in our Google Forms file upload guide.
Is there a way to prevent spam on a public Google Form?
Google Forms doesn't have a built-in CAPTCHA, but you can reduce spam by adding specific required questions that bots can't easily answer, using response validation on fields like email, and reviewing responses regularly to delete junk. If spam becomes a persistent problem, consider whether you truly need the form to be fully public, or whether requiring sign-in is an acceptable trade-off for cleaner data.
What's the difference between making a Google Form public and making it editable?
Making a form "public" means anyone can respond to it without signing in. Making it "editable" means adding collaborators who can change the form's questions and settings. These are controlled by completely different settings. You can have a public form that only you can edit (the most common setup) or a private form that multiple team members can edit together.
