HR departments spend more time chasing paperwork than reviewing it. New hires submit half-completed information sheets over email. Expense receipts arrive as blurry phone photos with no dates or context. Laptop serial numbers live in a spreadsheet no one has updated since 2022. The data you need to run payroll, process reimbursements, and track company assets is scattered across inboxes and shared drives -- and every missing field triggers another round of follow-up that can cost your team 3-5 hours per week.
This guide covers three employee information form templates every HR team needs: an employee information form, a payment receipt upload form, and a property and asset declaration form. Each includes the exact fields to collect, why they matter, and how to avoid the gaps that cause rework.
Together, these three forms cover the core of employee data collection -- from onboarding details to monthly expense receipts to the equipment records you need when someone leaves. Build all three and you replace dozens of email threads with structured submissions that are ready to file the moment they arrive.
Why Digital Employee Forms Beat Paper and Email
Paper forms vanish in filing cabinets. Email attachments with Social Security numbers sit in inboxes where anyone with access can read them. Word documents bounce back and forth with half the fields blank. Every method creates the same problem: incomplete data, security exposure, and no way to track who submitted what or when.
A digital employee information form template fixes this. Structured fields with dropdowns and required markers mean submissions arrive complete the first time. File uploads and form fields on the same page keep documents paired with the data they belong to. Automated reminders follow up with anyone who has not submitted -- so you stop writing "just checking in" emails every week and reclaim that time for work that actually moves the needle.
Employee Information Form Template
An employee information form template collects the personal, contact, employment, and financial details you need to onboard someone, run payroll, administer benefits, and stay compliant. It is the first form a new hire fills out -- and the one you ask them to update when they move, change banks, or get married. Getting it right on day one means no payroll delays, no tax filing errors, and no frantic calls for missing bank details on the first pay cycle. For a broader template covering students and volunteers, see our personal information form template.
Personal details
- Full legal name -- First, middle, and last as it appears on government-issued ID. Payroll and tax filings require the legal name -- a nickname or misspelling can delay W-2 processing and take weeks to correct with the IRS.
- Date of birth -- For benefits eligibility, identity verification, and mandatory reporting. Specify the format (MM/DD/YYYY) to avoid ambiguity.
- Social Security number or tax ID -- Required for W-4, I-9, payroll, and tax reporting. This is the highest-risk field on any HR form -- a single breach can trigger federal notification requirements. Never collect over unencrypted email.
- Home address -- Street, city, state, ZIP. Determines tax withholding jurisdiction, workers' comp, and W-2 mailing address.
- Phone number -- Mobile preferred. HR needs a reliable number for benefits deadlines, payroll discrepancies, and emergency closures.
- Personal email address -- A non-work email that survives termination. Useful for COBRA notices, final pay stubs, and post-employment tax documents.
Emergency contacts
- Emergency contact 1 -- name, relationship, and phone -- The person to call during a workplace accident or medical emergency. "Relationship" tells responders whether this person can authorize medical decisions.
- Emergency contact 2 -- name, relationship, and phone -- Backup if the first is unreachable. In a real emergency -- a fall on a job site, a medical episode at work -- one unanswered number wastes critical minutes.
Employment and payroll details
- Employment start date -- Drives benefits eligibility, probation periods, PTO accrual, and anniversary milestones.
- Department and position/title -- Routes the employee into the correct benefits group, org chart, and cost center.
- Employee ID number -- Internal identifier for payroll, timekeeping, and system access. Assign at onboarding so every downstream system uses the same number.
- Bank account details for direct deposit -- Bank name, routing number, and account number. Collecting this at onboarding means the employee gets paid electronically from day one -- no paper checks, no delays. Never collect over email.
- Tax withholding elections -- Federal W-4 filing status and allowances, plus state withholding if applicable. Getting this wrong means the employee overpays or underpays taxes all year.
- ID document upload -- Driver's license, passport, or government ID for I-9 verification. Combining the upload with form fields means identity details and the supporting document arrive in one step -- no separate email, no mismatched files.
Payment Receipt Upload Form Template
Expense reimbursement should be simple: employee pays, submits a receipt, gets paid back. In practice, receipts arrive as crumpled paper or forwarded attachments with no explanation. Finance teams can spend 30+ minutes per claim matching amounts to descriptions and asking "what was this $47.83 charge for?" A structured payment receipt upload form captures the receipt, context, and approval path in one submission -- cutting reimbursement turnaround from weeks to days.
Expense details
- Employee name -- Full name as it appears on payroll, so reimbursements land in the right account without manual matching.
- Department -- Routes the expense to the correct cost center. A five-second dropdown that saves ten minutes of lookup per claim.
- Expense date -- Date the purchase was made, not the submission date. Needed for period-end close and policy compliance (most organizations require submission within 30 to 60 days).
- Expense category -- Dropdown: travel, meals, office supplies, software, client entertainment, mileage, conference/training, equipment, other. Standardized categories make reporting possible.
- Vendor or merchant name -- Where the purchase was made. "Amazon" works for office supplies. "Restaurant" does not work for a client dinner -- you need the actual name for audits.
- Amount and currency -- Total in transaction currency. For international teams, require conversion at the transaction-date rate.
Receipt and approval
- Payment method -- Dropdown: personal credit card, corporate card, cash, debit. Determines whether the employee is owed a reimbursement or just needs coding and approval.
- Receipt upload -- Photo or scan of the original receipt. This is the most important field on the form. A phone-friendly upload lets employees snap a clear photo the moment the expense happens -- not dig through a jacket pocket three weeks later hoping the ink has not faded.
- Business purpose -- Why the expense was incurred: "Client lunch with Acme Corp to discuss Q3 renewal." The IRS requires a documented business purpose for deductible expenses. Non-negotiable.
- Project or client code -- For organizations billing expenses to clients. Tagging at submission is reliable; retroactive coding from memory is not.
- Manager name or approver -- Who authorized the expense or needs to approve it. Creates a clear accountability chain, especially above a set threshold.
- Supporting documents -- Itemized invoices, registration confirmations, mileage logs, or pre-approval emails. A file upload field catches everything in one submission instead of triggering follow-ups.
- Additional notes -- Context for edge cases: "Split bill, my share only" or "Tip included, receipt shows pre-tip amount." Prevents accounting from bouncing the claim back for clarification.
Property and Asset Declaration Form Template
Every organization issues equipment, and very few track it well. Someone in IT hands over a laptop, jots a serial number in a spreadsheet, and moves on. Six months later, no one knows which employee has which device -- and when that employee leaves, you are guessing what to collect. A property and asset declaration form creates a clear record the moment equipment changes hands, giving you a documented baseline for offboarding, audits, and insurance claims.
Asset identification
- Employee name and ID -- Full name plus employee ID, linking the asset to the correct person without ambiguity.
- Department -- IT needs this for budgeting and lifecycle planning. If marketing has replaced three laptops this year while engineering's fleet is intact, that spending pattern needs a closer look.
- Asset type -- Dropdown: laptop, desktop, monitor, phone, tablet, printer, key card, vehicle, specialized equipment, furniture, software license, other.
- Asset description -- Make, model, and specs. "MacBook Pro 14-inch, M3 Pro, 18GB RAM" is an asset record. "Laptop" is not.
- Serial number or asset tag -- The unique identifier tying internal records to warranties and insurance. Collect both if you use internal tags.
- Purchase value -- Original price or current book value. Needed for depreciation, insurance claims, and balance sheet accuracy.
Condition and accountability
- Condition at issuance -- Dropdown: new, like new, good, fair, signs of wear. Documents condition at handoff so there is no dispute about damage when the asset comes back at offboarding.
- Date issued -- When the employee took possession. Drives warranty tracking, depreciation, and refresh cycles.
- Location or assigned office -- Headquarters, branch, home office, or job site. Critical for insurance coverage and locating assets during audits.
- Photo of asset at issuance -- Visual record of condition at handoff. When someone returns a laptop with a cracked screen and says "it was like that," the photo settles the question.
- Acknowledgment of responsibility -- Checkbox or signature confirming the employee accepts responsibility and will return the asset upon request or termination.
- Expected return date or condition -- For temporary equipment, capture when it is due back. For permanent assignments, note the offboarding return process.
- Previous asset holder -- If reassigned rather than issued new, record who had it last. Creates a chain of custody for tracing damage or missing accessories.
Best Practices for Employee Form Collection
Combine form fields and file uploads
All three forms require structured data and supporting documents -- ID copies, receipt photos, asset images. If employees fill out a form in one tool and email attachments separately, you spend half your time matching documents to submissions. Choose a tool that lets employees submit form data and file uploads on one page, so everything arrives together and nothing gets lost.
Secure sensitive fields by default
Social Security numbers, bank accounts, and tax IDs should never travel over email -- a single forwarded message can expose data to anyone in the thread. Use encrypted submission channels, restrict access to authorized staff, and maintain audit trails that log who viewed each record and when.
Set submission deadlines
New hire forms: due before day one. Expense receipts: within 30 days. Asset declarations: at issuance. Without deadlines, forms sit for weeks -- and when someone submits an expense 90 days late, good luck finding the receipt.
Use dropdowns instead of free text
When 200 employees type their own expense categories, you get "travel," "Travel," "business travel," and "trip" for the same thing. Standardized dropdowns keep data clean and reporting possible.
Build update workflows
Employee information changes -- new addresses, new banks, new emergency contacts. Send periodic reminders (quarterly works well) asking employees to confirm their details are current. Outdated banking details mean bounced direct deposits; an outdated emergency contact means calling a number that no longer works when it matters most.
Collect Employee Forms and Documents in One Step
Chasing employees for personal information, expense receipts, and equipment records through email creates scattered data and endless follow-up. File Request Pro replaces that scattered process with a single, structured workflow -- no technical setup required.
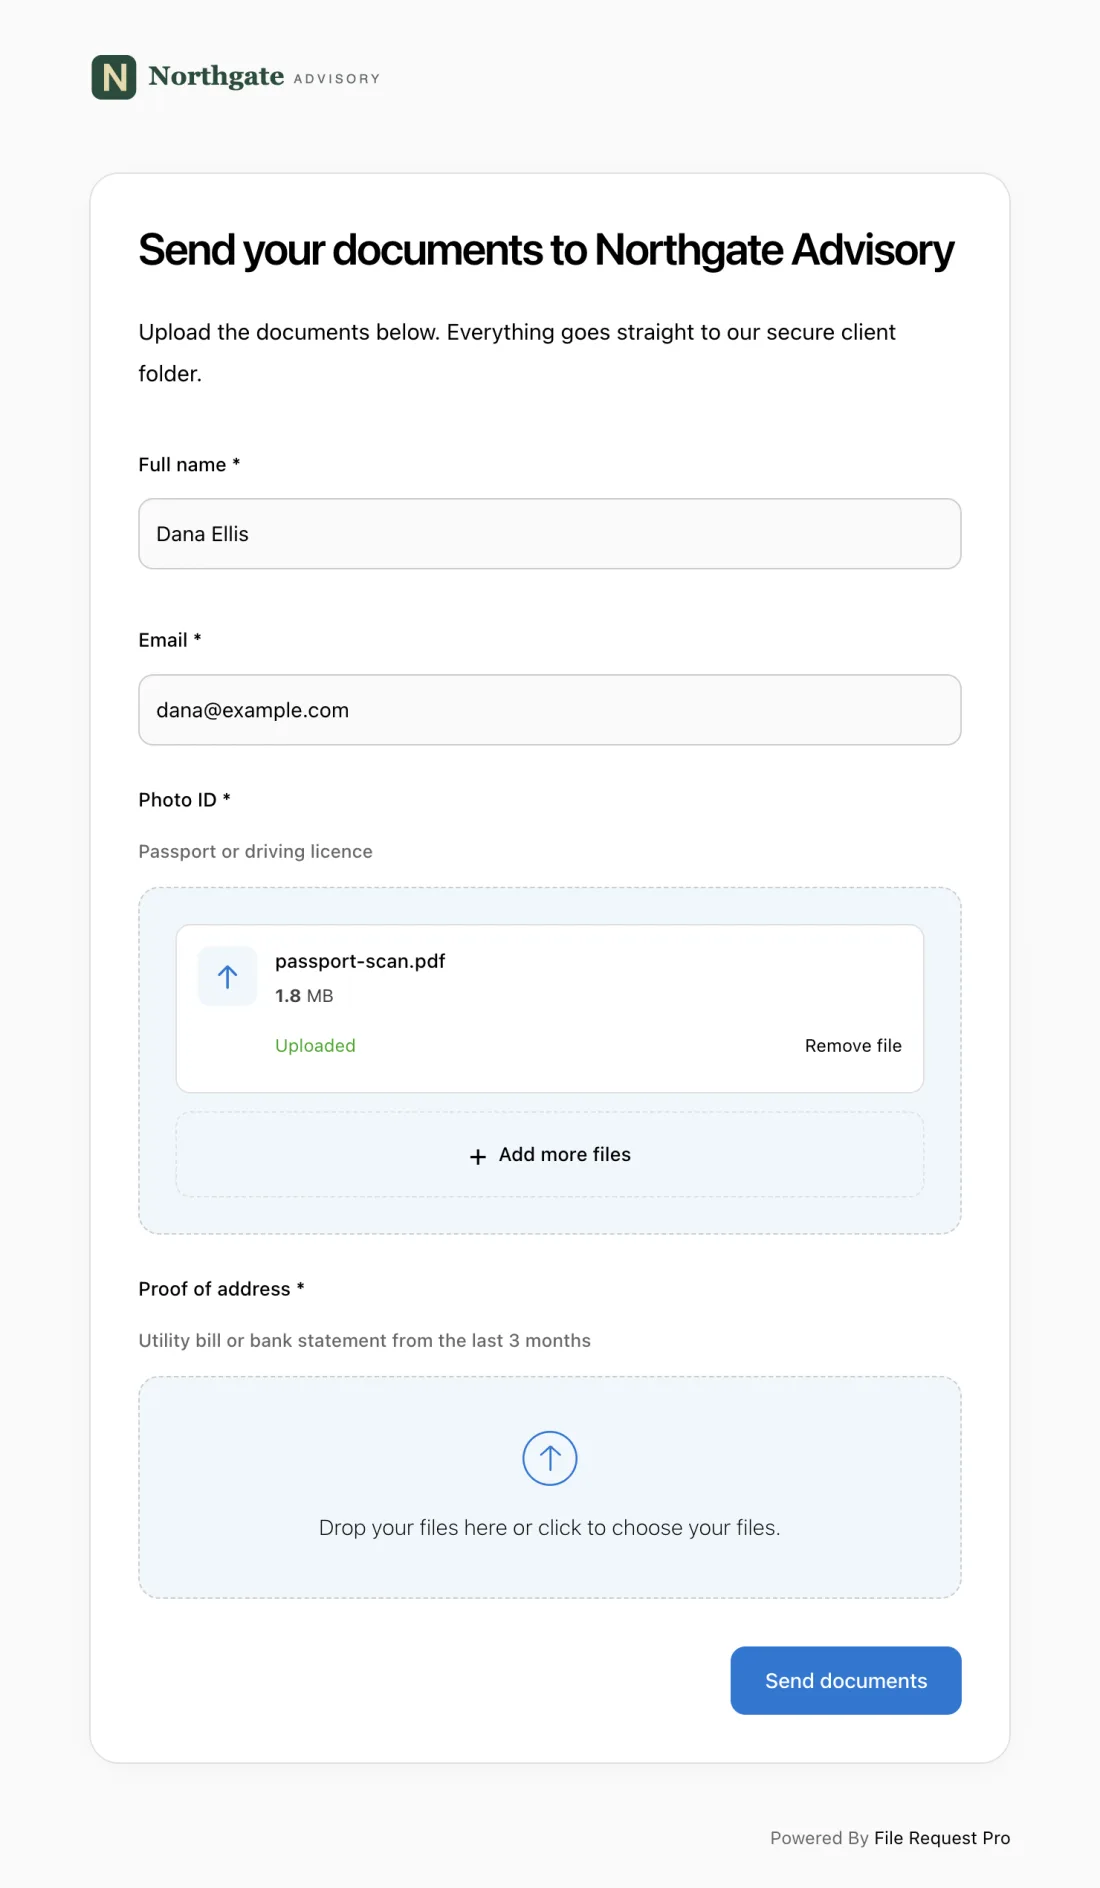
- Branded HR portal page. Your logo, colors, and instructions -- so employees see a professional, trustworthy page, not a generic form builder they might hesitate to submit sensitive data to.
- Form fields and file uploads on one page. Employee details, expense info, or asset records alongside receipt photos, ID copies, and equipment images in a single submission.
- Automated follow-up reminders. When employees miss a deadline, File Request Pro sends automatic reminder emails on your behalf. Set the schedule once and stop writing manual follow-ups -- the system handles it for you.
- Cloud storage sync. Submissions go directly to Google Drive, OneDrive, SharePoint, or Dropbox in organized folders. No downloading and re-uploading.
- No employee account needed. Employees click a link and submit. No app to download, no login to create, no password to remember -- especially useful for new hires who do not have company system access yet.
- Encryption and audit trail. Sensitive data like SSNs and bank details encrypted in transit and at rest. Every submission and access event logged for compliance reviews and audits.
Whether you are onboarding a new hire, collecting expense reports, or tracking company equipment, File Request Pro gives you one consistent way to gather what you need -- complete, organized, and secure. No credit card required to get started. Start your free trial.
Frequently Asked Questions
What is an employee information form used for?
An employee information form collects the personal, contact, employment, and financial details HR needs to run payroll, administer benefits, file taxes, and maintain personnel records. It is typically the first form a new hire completes during onboarding, and it should be updated whenever the employee's address, banking details, emergency contacts, or tax withholding changes. Keeping it current prevents payroll errors, compliance gaps, and delays when you need accurate records fast.
What should be included on a payment receipt upload form?
At minimum: employee name, expense date, vendor name, amount, expense category, business purpose, and a receipt upload. Without these fields, finance teams cannot code the expense, verify it, or process the reimbursement. Add a project code if you track expenses by engagement, and a manager approval field for authorization.
How do I track company equipment assigned to employees?
Use a property and asset declaration form that employees complete when they receive equipment. Capture the asset type, make and model, serial number, condition at issuance, date issued, and a photo. Have the employee acknowledge responsibility with a checkbox or digital signature. This creates a documented baseline for offboarding, audits, and insurance claims.
Can I combine multiple HR forms into one submission?
You can, but in most cases you should not. Each form serves a different purpose, and combining them creates a long form that employees are more likely to abandon partway through. Keep each one separate and focused. The exception: during onboarding, you might bundle the employee information form with an asset declaration if you are issuing equipment on day one.
How do I get employees to submit HR forms on time?
Three things consistently work: clear deadlines tied to tangible consequences (for example, no direct deposit until banking details are submitted), automated reminders so follow-ups happen without manual emails, and mobile-friendly forms employees can complete from their phone in under five minutes. Most late submissions happen because the form was inconvenient, not because the employee was unwilling.
Is it safe to collect Social Security numbers and bank details on an online form?
With the right tool, it is significantly safer than the alternatives -- which are usually unencrypted email attachments or paper forms left on desks. Use a platform that encrypts data in transit and at rest, restricts access to authorized personnel, and logs who views each submission. The real risk is not online forms themselves -- it is unsecured delivery methods like email and paper that offer zero protection.
Free Client Onboarding Checklist
Get the complete document checklist for your industry — interactive, with progress tracking.
Use the Free Checklist Tool →